How to Grow Microgreens Indoors in a Small Tray
Microgreens are one of the few edible crops that can fit on a small shelf and produce a harvest without needing a deep pot. They are seedlings harvested after cotyledons expand and, depending on crop and preference, around the appearance of early true leaves. They are not the same as sprouts grown in jars and eaten with their roots, nor are they miniature versions of lettuce grown to a mature head.
The appeal is obvious: a shallow tray, suitable growing medium, and a well-lit position can turn a little space into fresh garnish for sandwiches, salads, and meals. The challenge is that dense young seedlings and moist media can support mold or foodborne pathogens if hygiene is poor. A useful home method must cover sanitation and safe handling as carefully as it covers germination.
Choose crops that suit a first tray
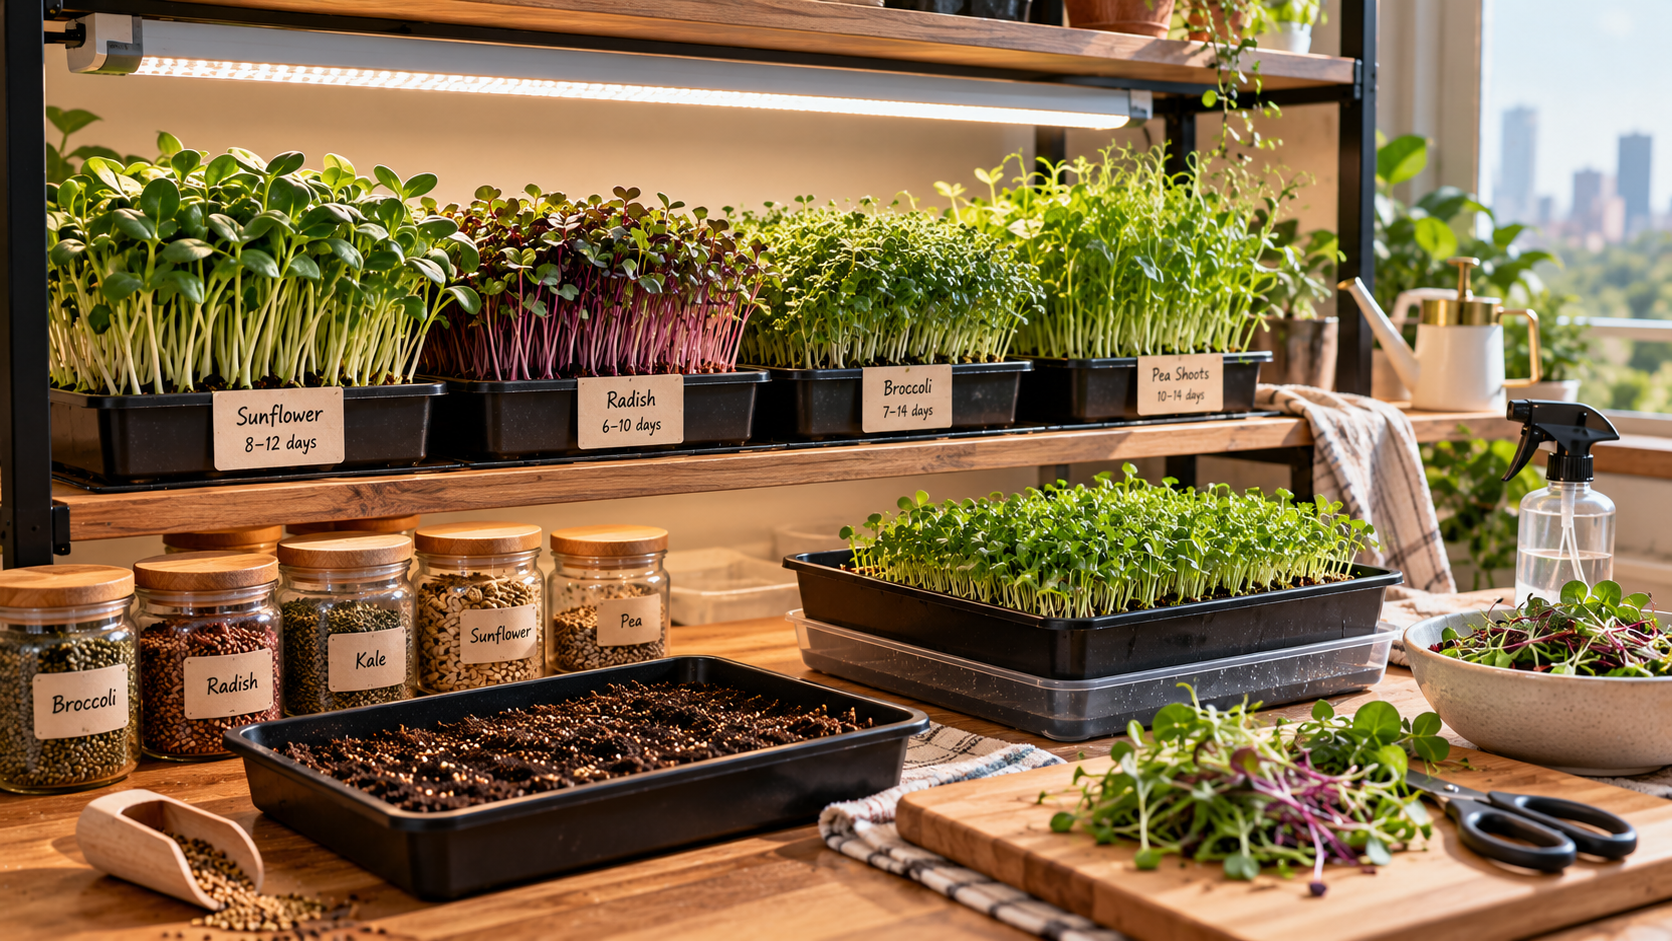
Radish, broccoli, kale, pea shoots, and sunflower shoots are common examples, but they differ in seed size, growth habit, taste, and time to harvest. Small brassica seeds typically produce delicate leafy microgreens. Peas and sunflowers produce larger shoots and require more room, water, and sometimes pre-treatment according to reputable seed instructions.
Choose seed sold for edible microgreen production where possible, or a reputable untreated vegetable seed suitable for the intended crop. Avoid seeds treated with fungicides or other chemicals not approved for producing edible shoots. Decorative lawn seed and birdseed blends may have unknown treatments or hygiene standards. Read the package rather than assuming any seed that can germinate is suitable for food.
For a first trial, grow one crop type in the tray. Mixing radish with peas, for instance, may create uneven germination and harvest timing. Separate trays make troubleshooting easier and help you learn each crop’s preferred density and light response. Once you have a repeatable process, experimenting with compatible mixes becomes less risky.
Select trays and a growing medium
A shallow, food-suitable tray with drainage holes supports moisture management. Place it over a clean catch tray that collects runoff but does not leave the root zone continuously submerged. A second tray may be used temporarily as a cover or weight for certain crops during germination if the crop guidance recommends it, but avoid keeping seedlings in dark, stagnant conditions longer than necessary.
Use a clean seed-starting mix, a suitable commercial grow mat, or another medium intended for edible microgreens. The correct choice depends on crop and setup. A sterile-looking bag is not a guarantee that handling remains sanitary, so wash hands and clean equipment before sowing. Avoid garden soil from outdoors, which can introduce pests and unwanted organisms into a dense indoor food crop.
Pre-moisten the medium evenly, then spread it across the tray without compressing it into a brick. Seeds require sufficient contact with the medium but also oxygen. Dense mats of seedlings can dry unevenly at edges while staying wet at the center. Set the tray where you can inspect moisture without repeatedly lifting and disturbing all the seedlings.
Sow with density in mind
Microgreens are grown densely compared with mature vegetables, but the correct rate depends greatly on seed size and species. Tiny brassica seed can occupy more sites per area than bulky pea seed. Copying one gram-per-tray figure for every crop is a common cause of crowding, disease, or disappointing coverage.
Consult the seed supplier or a university extension guide for a rate suited to the crop and tray dimensions. Spread seed as evenly as possible rather than pouring it into clumps. After sowing, press gently so seeds contact the medium. Follow crop-specific guidance about covering or darkness during germination. A short germination cover is different from leaving growing seedlings in an enclosed, humid box indefinitely.
If you notice an empty strip on one side of the tray, do not sprinkle new seed into a half-grown crop days later. Staggered germination complicates harvest and sanitation. Use the observation to adjust your next sowing pattern instead.
Give seedlings enough usable light
Once emerged, microgreens need suitable light to develop compact, healthy shoots. A bright window may suffice for some small harvests, but a dark winter room can cause elongated stems leaning toward the glass. A properly selected grow light can improve consistency. Follow manufacturer recommendations for intensity, distance, and photoperiod rather than running a hot lamp close to tender foliage.
Heat and light interact. A tray behind hot glass may dry unevenly; one beside cold panes may grow slowly. Observe actual conditions near seedlings. Do not use a timer as evidence that light intensity is sufficient: a lamp running many hours at very low intensity may still produce weak growth.
The RootLuma grow-light guide explains these basic variables. For microgreens, the goal is a compact crop with sturdy stems, not maximum leaf size at any cost. Excessive stretch and pale foliage are clues to investigate light and temperature, though some crop-specific color changes are normal.
Water without soaking the canopy
Many growers prefer careful bottom watering after roots establish, because it can keep dense leaf canopies drier. Place the growing tray briefly into a clean catch tray with an appropriate amount of water, allow the medium to take up moisture, and remove excess so roots are not sitting permanently in pooled water. The exact volume and frequency depend on tray depth, crop, and room conditions.
Top watering can work at early stages with a clean gentle method that does not displace seeds. As foliage thickens, repeated heavy overhead watering may keep stems wet and reduce airflow. Monitor the middle and edges of the medium rather than deciding that a tray is dry because one corner looks pale. Small trays can switch from comfortably moist to dry quite quickly near warm windows.
Do not compensate for missed watering by maintaining standing water continuously. Persistent saturation favors unwanted microbial growth and can weaken roots. Good moisture management means moist enough for young seedlings, not an environment without air.
Recognize root hairs, mold, and genuine warning signs
Young seedlings may develop fine white root hairs near the base. These can resemble fuzzy mold at first glance but are attached to roots and typically appear consistently around emerging seedlings. Mold may spread across seed hulls or media surfaces and can be accompanied by a musty odor or collapsing tissue. Do not use a single photo as proof; look closely and consider the pattern.
Damping-off disease may cause seedlings to topple or become constricted and mushy near the soil line. Overcrowding, contaminated equipment, and persistent wetness can contribute to problems, although the causal organisms and conditions vary. If a tray shows widespread collapse or suspicious fungal growth, discard the affected crop rather than treating edible seedlings with improvised chemicals and eating them anyway.
Food safety deserves special caution because microgreens are consumed raw. Keep pets and dirty tools away from the growing station. Use safe water, wash hands before harvesting, and clean food-contact surfaces. People at higher risk of foodborne illness should follow relevant public-health guidance about raw produce; home growing does not eliminate microbial risk.
Harvest at the right stage
Most microgreens are cut near the medium surface when they have developed the desired edible shoots, rather than pulling up the entire root mat. Use clean scissors or a sanitized knife suitable for food preparation. Keep cuttings out of contact with dirty potting media. Harvest timing varies by crop, temperature, light, and the stage you prefer, so avoid treating one day count as a guarantee.
Some peas and other crops may regrow to a degree after cutting, but repeat harvest quality is not universal. A single clean harvest is a practical expectation for many home trays. Compost or discard spent media responsibly; repeatedly reusing a dense root mat for a new edible crop is not the same as starting with fresh clean medium.
For household use, University of Maryland Extension advises rinsing freshly harvested microgreens with clean water, patting them dry, and using them promptly or refrigerating them. Use potable water and clean food-contact equipment. A rinse may remove loose particles, but it cannot reliably eliminate foodborne pathogens or make spoiled or contaminated greens safe. Discard a questionable harvest rather than trying to rescue it by washing.
Commercial post-harvest procedures require a different risk assessment: Penn State Extension cautions against routine washing of microgreens unless necessary because it can spread contamination. Its discussion of commercial food-safety regulation should not be read as a legal requirement for a home tray. In either setting, keep cut shoots clean, avoid prolonged wet storage at room temperature, and refrigerate promptly as appropriate.
A one-tray beginner plan
Stage Practical goal Checkpoint
Prepare Clean tray and suitable untreated seed No dirty residue or unknown seed treatment
Sow Even coverage matched to seed size No thick clumps or bare strips
Germinate Appropriate moisture and conditions Emergence without persistent waterlogging
Grow Sturdy shoots under adequate light Minimal stretching and no spreading collapse
Harvest Cut with clean equipment Keep edible shoots free from media and debris
Reset Wash trays and discard spent mat Prepare a genuinely clean next cycle
The exact dates are crop-dependent. Treat this as a process plan, not a promise that every seed type becomes ready on the same day.
Troubleshooting the first crop
Seedlings are tall and pale. Review usable light and temperature. They may be stretching toward a weak source, or the cultivar may naturally have pale coloration during an early stage. Compare with seed-supplier expectations.
A sour smell develops. Check for stagnant water, decaying hulls, and poor airflow. If the tray is collapsing or contaminated, do not plan to eat it.
The center grows densely while edges remain empty. Sow more evenly on the next tray and check whether watering pooled the seed in one area.
Seeds sprout unevenly. Seed age, crop differences, sowing depth, moisture, and temperature all matter. Use a single crop and a clean baseline to troubleshoot.
The tray attracts insects. Inspect media condition and food hygiene. Avoid applying pesticides to an edible crop unless specifically approved and appropriate; often the safest response is discarding a compromised small tray and correcting the setup.
The RootLuma guide to container-grown leafy greens covers vegetables grown to a more mature harvest stage. Microgreens differ in harvest timing, planting density, and food-safety handling, so the two guides serve distinct purposes.
Build food safety into the entire growing cycle
Cleanliness begins before the seeds go into the tray. Wash reusable containers, clean the work surface, and keep raw meat, household cleaning chemicals, and pet supplies away from the growing area. Use potable water and avoid reusing liquid that collected under a previous questionable crop. A small home tray does not have the controlled sanitation systems of a commercial facility, so your handling routine matters.
Seeds themselves can introduce microbial hazards. Purchase them from reputable sources intended for edible production and store them according to the supplier’s instructions. Do not assume that seeds are safe because they look dry or smell normal. If a supplier issues a recall or safety notice, follow it. Do not improvise household chemical seed treatments for food production without credible guidance specific to the seed and purpose.
Keep harvest tools and containers separate
A pair of scissors used to cut diseased houseplant roots should not go straight into a microgreens harvest. Use clean food-suitable cutting tools, and place harvested shoots in a clean container. If you prepare greens for someone with elevated foodborne illness risk, follow public-health guidance and consider whether eating raw microgreens is appropriate for that person. The nutritional appeal of a home harvest does not remove these considerations. Penn State Extension’s microgreens food-safety guidance identifies seed and growing-media inputs, water quality, hand hygiene, cleaned equipment, and harvest handling as important contamination pathways. Its discussion of the U.S. Food Safety Modernization Act is directed at commercial production and regulatory responsibilities; it should not be presented as a legal checklist automatically imposed on someone growing a tray for personal use.
After harvesting, dispose of the spent root mat, wash the tray, and allow it to dry as appropriate before starting again. This “reset” step is part of the crop, not optional work performed only when visible mold appears.
How to decide whether a tray should be discarded
A strong unpleasant odor, widespread slimy collapse, or suspicious mold spreading through edible shoots is a reason not to serve the harvest. Do not cover contamination with salad dressing, wash it briefly, and assume it is safe. Because a tray contains relatively little crop, discarding an unsafe batch is generally more reasonable than experimenting with rescue treatments on food that will be eaten raw.
The food-safety decision immediately before harvest
Seed and crop identity: Confirm that you used an edible species and untreated seed suitable for the intended food crop. A decorative seed packet is not enough evidence of suitability.
Growing conditions: Reject trays with foul odors, slimy collapse, suspicious spreading mold, or evidence of animal contamination. White root hairs alone are not a reason to discard a healthy crop; investigate the complete pattern.
Hands and tools: Wash hands and use clean scissors, a cleaned surface, and a clean food container. Keep cut shoots away from used potting mix and dirty catch trays.
Handling afterward: Refrigerate promptly where appropriate, follow reliable food-safety advice, and do not assume washing can make a contaminated harvest safe.
Microgreens and sprouts are different crops, and one microgreen sowing generally gives a main harvest rather than indefinite regrowth. When preparing raw greens for someone at higher risk of foodborne illness, seek health guidance and choose the safer option rather than relying on the fact that the crop was grown at home.
Begin with one clean, repeatable tray
You do not need an expensive vertical farm to produce a small harvest of microgreens. Choose a suitable seed, maintain clean equipment, sow at the crop’s correct density, and balance light, moisture, and airflow. Harvest at an appropriate stage and reset the tray carefully. A modest reliable crop is a better starting point than a crowded, perpetually damp system built for photographs rather than safe food.
References
University of Maryland Extension — Growing microgreens and baby greens indoors
Penn State Extension — Ensuring Food Safety in Microgreens Production