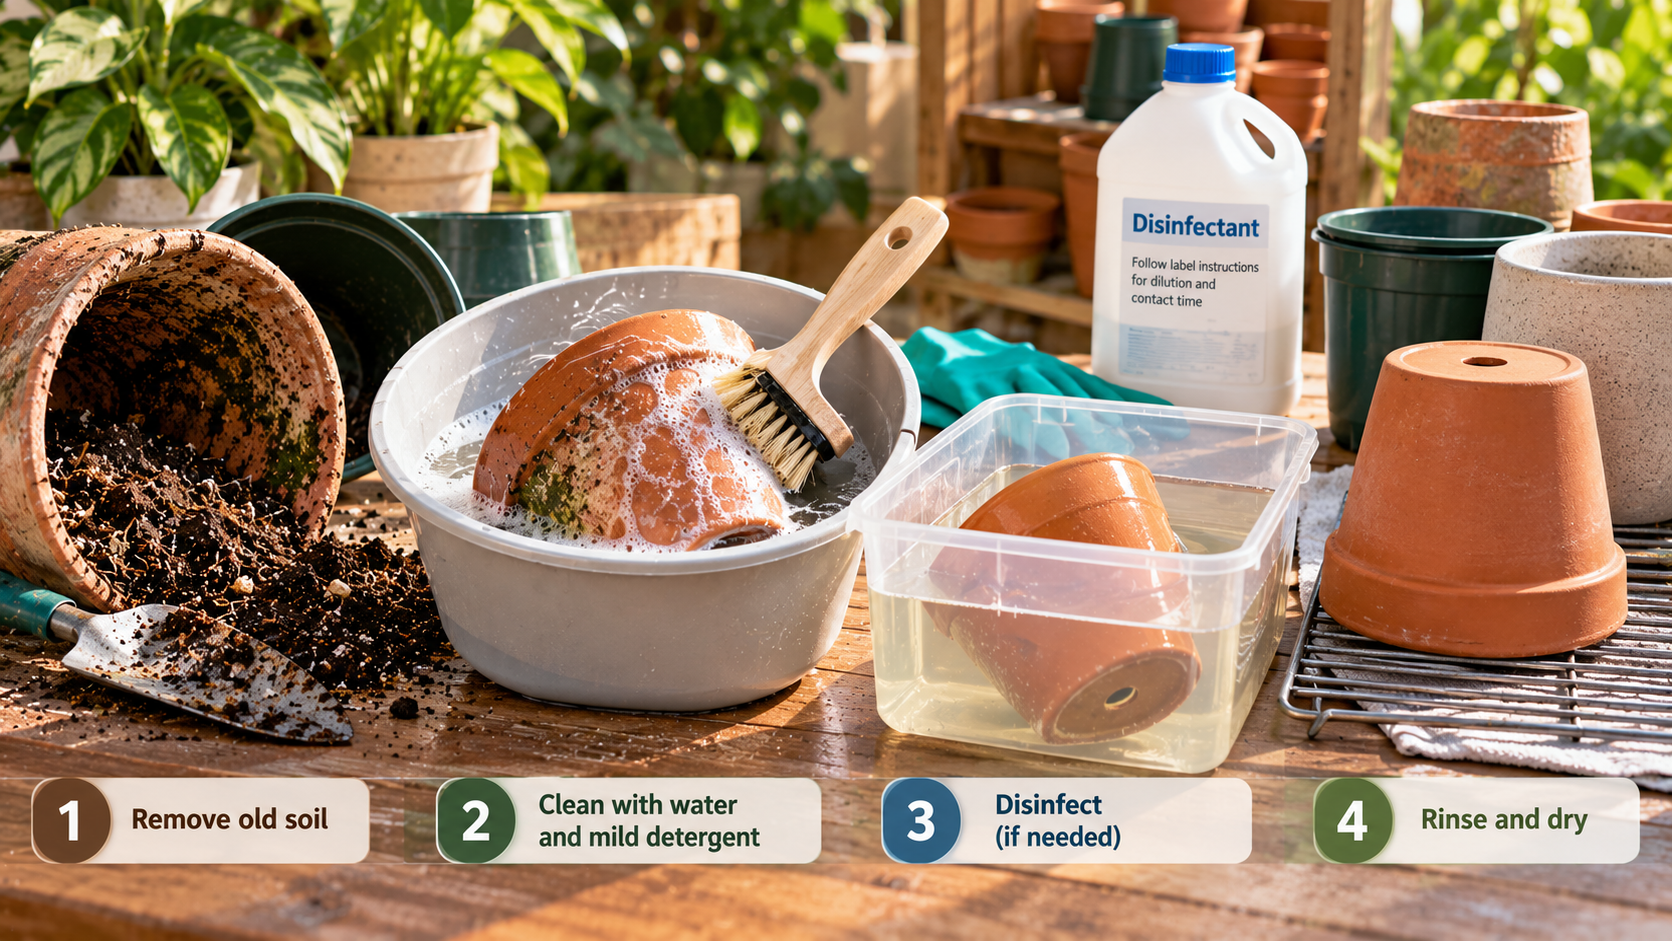
How to Clean and Disinfect Used Plant Pots Before Reusing Them
A used flowerpot may look clean while carrying old potting medium, algae, fertilizer deposits, or potentially plant-disease organisms in narrow grooves. Reusing pots is economical and reduces waste, but the process should be more thoughtful than simply shaking out old soil and filling the pot again. The central distinction is between cleaning, which removes debris, and disinfecting, which applies an appropriate agent to a surface that has already been cleaned.
Not every used pot needs the same treatment. A container from a healthy plant that was repotted for size may need routine washing and drying. A pot that held a plant with serious root disease deserves more careful handling, and a porous wooden or severely cracked container may not be practical to disinfect reliably. Choose a process based on the material and risk rather than using the strongest chemical available by default.
Decide whether the container is worth saving
Inspect for cracks, sharp edges, blocked drainage holes, and brittle or flaking material. A plastic nursery pot can usually survive cleaning if its structure is intact. A broken ceramic rim can cut hands or damage roots. A metal container with corrosion or unsuitable drainage may need repurposing as a decorative outer cover rather than reused for direct planting.
Porous terracotta absorbs water and may show mineral deposits along its surface. Some staining is cosmetic, but old soil packed inside a narrow drainage hole can obstruct water flow. Wooden planters, woven baskets, and other absorbent materials are harder to clean thoroughly because residues may remain below the surface. If disease contamination is a credible concern and thorough sanitation is impossible, replacement or non-growing reuse may be safer.
Set aside pots from known diseased plants rather than mixing them immediately into a pile of clean containers. This makes it easier to choose an appropriate disinfection step. Do not pour old diseased potting media into a fresh supply bag, and avoid reusing it for seedlings that may be especially vulnerable.
Clean first: remove soil, salts, and algae
Start by emptying loose medium into an appropriate waste container. Brush away dry debris outside or over a tray where dust will not spread through a living area. If mold or respiratory sensitivity is a concern, avoid creating clouds of dust. Soak stubborn soil briefly as appropriate to the pot material, then scrub with a brush and mild detergent.
Pay special attention to the drainage hole, the underside of the rim, and textured grooves. Soil lodged in those places can shield organisms from a disinfectant. Rinse away soap and remaining debris thoroughly. A clean-looking surface is not necessarily sterile, but removing organic matter is essential because dirt can reduce the effectiveness of some disinfectants.
For mineral crust on terracotta, investigate the source rather than focusing only on appearance. Hard water and fertilizer salts can accumulate after many cycles of evaporation. Some staining will persist without harming the next planting, while heavy deposits may warrant more cleaning or replacement. Avoid abrasive metal tools that weaken thin plastic or chip a glazed pot.
Disinfect only when it serves a purpose
University Extension guidance on sanitizing containers generally distinguishes washing from the use of an appropriate disinfectant with specific dilution and contact-time requirements. Products vary by material, jurisdiction, and intended use. Consult current local guidance and the disinfectant label for the exact product you possess. Do not rely on an internet recipe that omits contact time or mixes incompatible cleaning chemicals.
If you use a labeled disinfectant, apply it only after the pot is visibly clean. Follow instructions for concentration, protective equipment, ventilation, surface wet time, and rinsing where required. Work away from living plants and edible crops unless the product specifically permits their proximity. Never mix bleach with vinegar, ammonia, acids, or other cleaners; hazardous gases can result.
For a pot that formerly held a severely diseased plant, ask whether the material allows effective surface contact. Deeply cracked plastic, unsealed wood, or a heavily porous container may not be worth reusing for a vulnerable plant. Sanitation reduces certain risks; it does not prove that every organism has been eliminated from every crevice.
Why contact time matters
A disinfectant has to remain on the intended surface for the time specified by its label. Spraying a dirty pot and immediately rinsing it may have little effect, especially when organic matter shields the surface. Equally, leaving a product on far longer than instructed is not automatically better and can damage materials or create handling hazards.
Arrange a simple workflow: wash and rinse the used pot, allow the excess water to drain if the next product requires that condition, apply the disinfectant as directed, observe the required contact period, and complete any specified final rinse or drying step. Label a work area so that treated pots do not become confused with dirty ones midway through the process.
Terracotta and plastic need different handling
Terracotta: Its porous structure holds water and mineral deposits. Avoid thermal shocks and rough impacts that crack the pot. Allow adequate drying before storage. Some sanitizing approaches may be less effective inside deeply porous material, so consider the original plant’s health history.
Plastic: It is usually lighter and easier to clean, but scratches and seams can retain debris. Very old plastic may become brittle from sunlight. Inspect the drainage openings and rim carefully, then follow product compatibility guidance before chemical treatment.
Glazed ceramic: A sound glazed interior can be relatively easy to wash, but chips expose absorbent material and may create sharp edges. Many ornamental cachepots have no drainage hole. Use them as outer covers with a properly draining inner pot rather than relying on a disinfected surface to compensate for standing water.
Fabric grow bags: These hold debris in fibers and seams and often require a different cleaning approach than smooth rigid pots. Follow manufacturer care instructions. Reusing one that held a serious disease may be less practical than washing a smooth plastic pot.
Prepare a clean pot for its new occupant
Once the container is clean, inspect drainage again. A pot with sanitized walls but blocked holes is still a poor growing environment. Choose fresh medium appropriate to the plant and avoid burying the crown too deeply. If switching plant types, reassess pot size; an old tomato container may be much too large for a newly propagated pothos cutting.
The RootLuma repotting guide explains how root mass and container size should influence planting. Reusing a pot successfully means matching it to a new plant, not just making its surface spotless. Old fertilizer granules left in crevices should be removed during cleaning so the next plant does not receive an unknown dose.
For household plant hygiene more broadly, RootLuma’s leaf-cleaning guide emphasizes gentle handling of living tissue. Pot washing is different: it happens away from the plant and can tolerate scrubbing that would injure leaves or roots.
An efficient batch-cleaning station
If you have fifteen empty nursery pots, sort them by material and condition before starting. Discard unusable ones. Brush out soil over a bin, wash the survivors with detergent, and rinse them in a separate area. Then separate pots that only needed washing from those with a credible disease history requiring a labeled disinfection step. Keep the finished pots on a clean drying rack rather than stacking wet containers tightly.
This simple sorting prevents two problems. First, clean pots do not repeatedly contact dirty ones. Second, you avoid applying strong chemicals to every container without assessing whether they are justified. A reusable brush should itself be cleaned after working with contaminated pots, and washing water should be disposed of appropriately under local rules.
A checklist before storage
Check Why it matters
No visible roots or potting debris Removes residues that can shield organisms
Drainage holes open Allows the next planting to drain correctly
Material structurally sound Prevents breakage and root or handling injury
Disinfection recorded if warranted Keeps diseased-origin pots separate until processed
Rinsed and dried as required Reduces residues and unwanted wet storage
Stored apart from dirty pots Prevents avoidable recontamination
Mistakes that defeat the process
Disinfecting over a layer of dried soil is ineffective housekeeping. Using household cleaners at guessed concentrations may create chemical injury or exposure risks. Mixing cleaners is particularly dangerous. Reusing contaminated growing media with the pot undoes much of the benefit of washing its walls. And planting into a container without drainage is still a root-health risk, no matter how thoroughly the surface was sanitized.
Another common error is treating cosmetic marks as proof of disease. Terracotta often accumulates whitish mineral crust that does not establish the presence of a pathogen. Learn to distinguish residue from decaying roots or a known plant disease. When in doubt, choose a conservative cleaning method and seek local guidance before reusing a high-risk container.
Create a simple contamination boundary when several plants fail
When several pots have held plants with suspected root disease, keep those containers and their old media together until you decide what can be reused. Use a dedicated brush and work over a tray. Clean your hands and tools before handling healthy plants or fresh medium. The purpose is not to create a laboratory sterile zone; it is to avoid moving avoidable debris from compromised material into clean propagation supplies.
If you do not know what caused the original decline, a damaged plant and wet soil do not necessarily prove an infectious disease. Nevertheless, ordinary washing and cautious handling are reasonable. Keep records of which pots were associated with severe symptoms, especially if you reuse dozens of containers. A small piece of tape can prevent accidentally moving an unprocessed pot into the clean stack.
Make the disinfection choice explicit
Before using a chemical, ask three questions: what risk am I trying to reduce, is this disinfectant appropriate for the material, and can I follow its full label safely in this setting? If you cannot answer, washing and setting the pot aside while you consult local extension guidance may be more sensible than improvisation. Stronger is not a synonym for safer or more effective.
Do not measure household disinfectants by splashes or capfuls when specific dilutions are required. Never mix products. Store them in original labeled containers, protect skin and eyes as directed, and provide ventilation. Keep children, pets, and edible seedlings away from the processing area until surfaces have been prepared according to instructions.
A practical reuse decision for terracotta
Imagine two similar clay pots. One held a thriving spider plant and is covered mainly with mineral crust. The other contained a plant with severe decay and has hairline cracks inside. Both need debris removed, but the first may be perfectly suitable after ordinary cleaning while the second is a weaker candidate for reuse because cracks create difficult-to-reach contamination sites. The decision is about material condition and disease history, not whether a pot looks aesthetically old.
Keep dry storage genuinely dry
Stacking wet pots immediately after washing can trap moisture and encourage unwanted residue. Allow adequate drying before placing them in a clean storage area, subject to the relevant disinfectant instructions. Use breathable spacing and protect them from garden soil or splashing irrigation water. A pot that is cleaned today but stored under an outdoor drainpipe may need attention again before planting next month.
A sanitation checkpoint before the next planting
Check the pot in this order: structural integrity, drainage openings, removal of all old roots and debris, visible cleaning, and the need for a separate disinfection step. A previously diseased plant raises the standard of care, but not every reusable container requires the strongest chemical treatment.
Do not rely on sunlight alone to disinfect crevices or porous surfaces. If a disinfectant is appropriate, follow the specific product label, including contact time, ventilation, rinsing where required, and material compatibility. Never mix bleach with acids, ammonia, or other cleaners. Food-preparation appliances are not a good default place to process old plant containers.
After the pot is clean and dry, keep it separate from dirty equipment until planting. Sanitation reduces one source of contamination; it cannot compensate for persistently waterlogged media, poor plant placement, or the introduction of a new diseased plant.
Reuse with a reasoned process
Keeping old pots in circulation is worthwhile when they remain sound and can be prepared responsibly. Remove visible debris, wash thoroughly, decide whether disinfection is warranted, and follow a product’s specific directions rather than improvising chemical treatments. Finally, choose a new plant and medium that suit the container. Good sanitation protects the next planting; good horticulture keeps it healthy afterward.
References
Iowa State University Extension — How clean and disinfect plant containers