Damping-Off in Indoor Seedlings: Why Stems Collapse
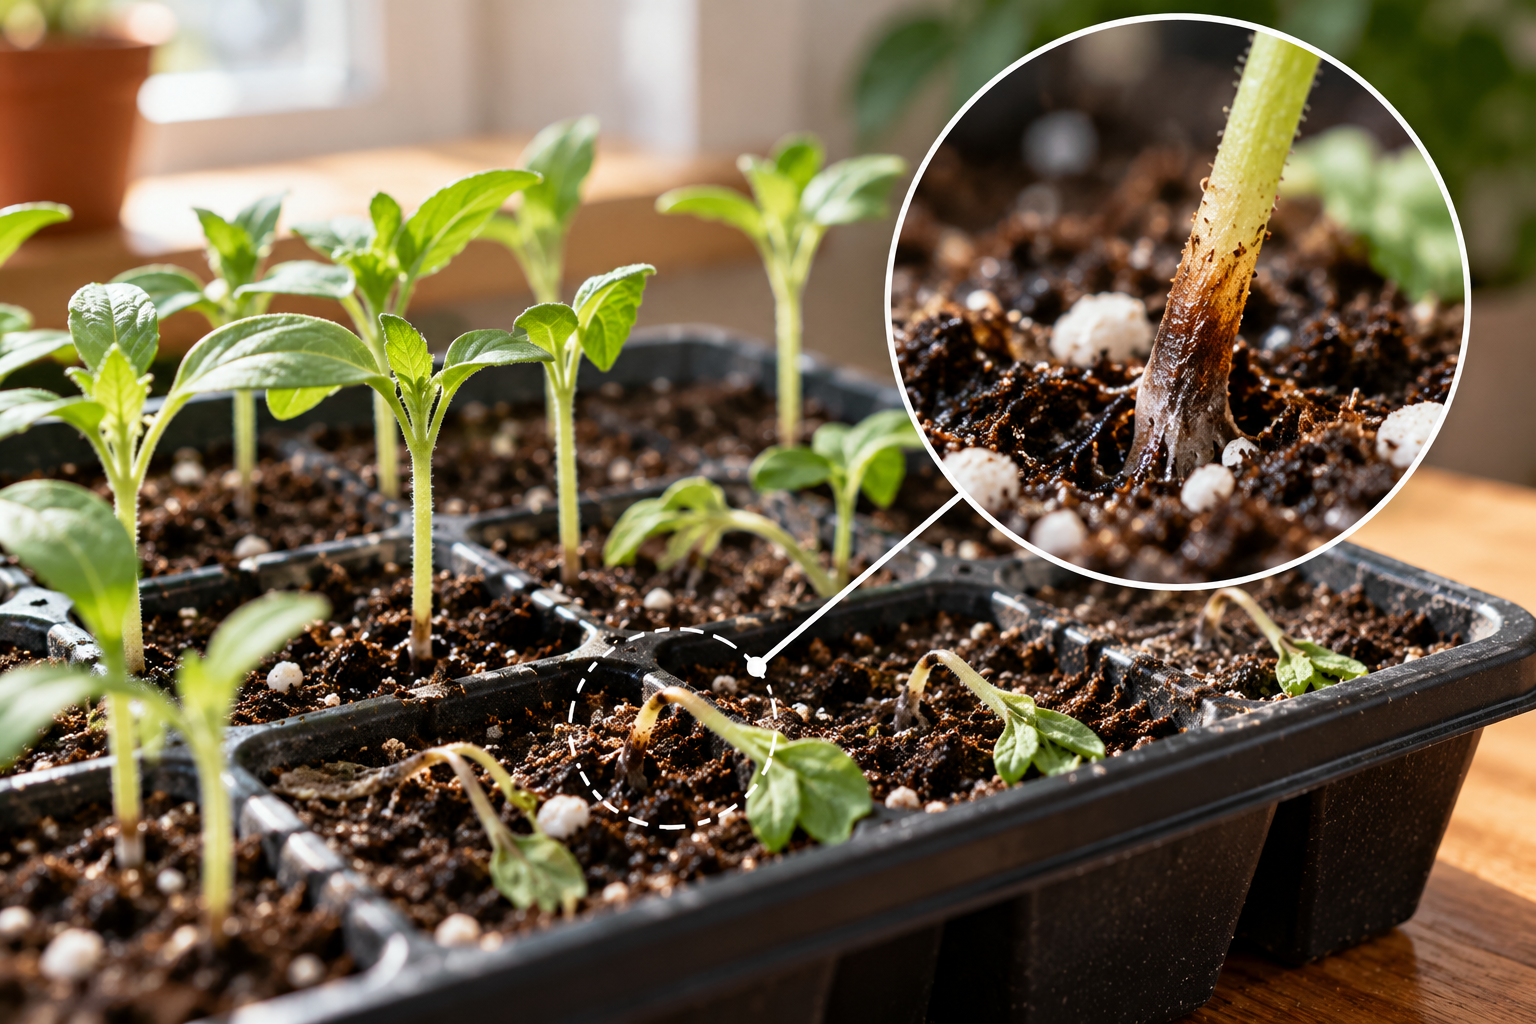
A tray of seedlings can look healthy in the morning and contain several fallen stems by the next day. The most recognizable picture is a tiny plant pinched at soil level, its top lying sideways on the mix as though someone cut the stem with a fine thread. Gardeners often call this damping-off, but not every drooping seedling has a pathogen problem.
Damping-off is a group of diseases affecting vulnerable seeds and seedlings, often involving soilborne fungi or water molds. Effective management begins with recognizing the pattern, removing severely affected plants, and correcting the conditions that allowed infection. A seedling whose stem has already rotted through generally cannot be restored by extra fertilizer, a stake, or a stronger grow light.
Recognize the critical stem symptoms
Examine where the fallen seedling meets the growing medium. In damping-off, tissue may appear narrow, darkened, water-soaked, or soft at or slightly below the surface. Some plants collapse rapidly after this section loses structural integrity. Roots may be discolored or reduced, and seeds may rot before they ever emerge.
The University of Minnesota Extension guide identifies organisms including Rhizoctonia, Fusarium, and Pythium among common causes. These belong to different biological groups; “damping-off fungus” is a practical umbrella term rather than a precise laboratory diagnosis of one species.
A useful close inspection compares several seedlings. Do multiple plants fail near the soil line in the same moist area of a tray? Does tissue look translucent and constricted rather than simply bent? Are unaffected seedlings in another tray, with different mix or irrigation, still upright? Patterns across cells can help distinguish disease from a one-off accident.
Use clean fingers or disposable tools when lifting a collapsed specimen. Avoid pushing diseased material through healthy cells. Photograph the stem base and the entire tray before disposal; the distribution can help a horticultural professional identify a likely cause if problems recur.
Separate damping-off from ordinary seedling failures
A leggy seedling can bend because it has a long, weak stem formed under inadequate light. Its base may remain green and intact rather than water-soaked. Improving light can help subsequent growth, but it does not reverse a stem already badly damaged by disease. Check the base before assuming every lean is a light problem.
A seedling may wilt because the potting mix is too dry. In that case, roots and stem may still be structurally sound; carefully restoring moisture can change its condition. Conversely, a seedling in wet mix may also wilt if roots have been damaged. Looking only at the leaves cannot distinguish these causes.
Physical injury matters too. A pet, a heavy stream of water, a falling dome, or careless thinning can snap a young stem. A clean break at an obvious point differs from a narrow, mushy, discolored region near the soil line, although visual diagnosis is not perfect. High soluble salts from overfeeding can injure roots and mimic poor establishment.
Do not label an entire tray diseased solely because seeds germinated unevenly. Seed age, sowing depth, low oxygen, temperature, and species-specific germination needs also affect emergence. Damping-off becomes more plausible when tissue symptoms and environmental risk factors align.
Why new seedlings are especially vulnerable
Newly emerged seedlings have little stored energy and delicate stem and root tissues. Their defenses and root systems are still developing. Under favorable conditions, young plants mature past their most susceptible stage, but while they remain tiny, pathogens can invade quickly and cause collapse before obvious warning signs accumulate.
Many damping-off pathogens survive in contaminated soil, old plant debris, or dirty equipment. Shared irrigation water and tools can move material between cells. The disease can therefore spread within a tray even if seeds were initially healthy. A contaminated reused medium increases risk, though infections can also occur when spores are introduced from elsewhere.
Persistently wet conditions make many outbreaks more likely. Water displaces air from the pores of a saturated medium and can slow roots. Inadequate light, low temperatures for the crop, and dense planting can further delay healthy development. These stresses do not create pathogenic organisms from nothing, but they can make a tray a better environment for disease than for vigorous seedlings.
Different pathogens respond differently to conditions, so avoid oversimplifying the disease as “cold water caused fungus.” The management principle is broader: clean inputs, appropriate moisture, suitable temperatures, and enough light to move seedlings rapidly through their vulnerable stage.
What to do when a stem collapses
Remove severely affected seedlings promptly. A stem that has decayed at the base is unlikely to regain its original connection to the roots. Do not bury the collapsed section deeper and hope it will heal. Take out the affected plug carefully when possible, including nearby contaminated medium if indicated, and prevent drips and crumbs from spreading into healthy cells.
Evaluate how widely the outbreak has progressed. If multiple cells in a small shared tray are collapsing, restarting with clean materials may be more reliable than spending weeks on weakened plants. If only one plug is affected and neighboring plants are vigorous, separating healthy cells into clean containers may be reasonable, with careful observation afterward. There is no guarantee that apparently healthy cells are free from infection.
Remove fallen leaves and discarded tissue from the growing area. Clean tools before they touch healthy trays. Empty standing water, check drainage, and reconsider whether the medium is staying wet too long. Do not reuse contaminated starting mix for new seedlings as though it were clean.
Do not apply an unlabelled fungicide or household disinfectant to living seedlings. Products differ by target organism, crop, location, and legal registration. In many home situations prevention and restarting are the safer practical options. If valuable or repeated crops are affected, local Extension or diagnostic laboratories can advise on a more specific investigation.
Choose fresh, suitable seed-starting medium
Seed-starting mixes should drain while retaining enough moisture for germination. Fine texture helps with seed contact, but an excessively compacted, saturated medium restricts aeration. Avoid scooping ordinary garden soil into indoor seed trays. Soil and decomposing debris can introduce pathogens, and garden soil often compacts differently from properly formulated seed-starting substrates.
Use a fresh commercial mix intended for propagation, especially when earlier sowings failed from suspected disease. Open bags in a clean area and store leftovers away from standing water and dirt. A bag lying open on a damp floor or used as a surface for dirty tools is not guaranteed to stay clean simply because its label says “seed-starting.”
Do not try to sterilize an entire household batch of used mix by arbitrary microwave or oven instructions. Such improvisations can be hazardous and difficult to validate. For a modest tray, fresh suitable mix is a straightforward way to remove one major uncertainty.
The goal is not a biologically lifeless system forever. It is to prevent introducing a significant pathogen load at a stage when plants are particularly fragile. As healthy seedlings establish, ordinary microbial life will still exist around their roots.
Clean trays, pots, and tools properly
Remove old root fragments and stuck-on soil before disinfecting reusable equipment. Organic residue can protect organisms from some cleaning treatments. Wash trays and tools thoroughly, then follow an appropriate disinfecting procedure compatible with the material, product label, and local safety rules. Do not mix cleaning chemicals, and rinse or dry equipment when required before reusing it.
Minnesota Extension recommends cleaning and disinfecting previously used pots and trays for damping-off prevention. A novice may find buying a few new propagation cells easier than trying to clean severely degraded containers with inaccessible corners. Reusing equipment is environmentally sensible when it can be cleaned effectively; reusing contaminated media is a different decision.
Keep clean trays separate from the area where old diseased plants are discarded. Wash hands or change gloves between tasks, especially if you have handled garden soil. Do not place cleaned tools back into a bucket containing old potting mix.
Start with an organized workspace. If watering cans, labels, scissors, and trays have designated clean places, the risk of unintentionally carrying debris from one container to another is easier to manage.
Manage water and temperature as a system
Check moisture at seed depth. The top may appear pale and dry while the bottom remains saturated, or the surface can look wet because of mist while deeper roots have little water. Use a gentle watering method that actually hydrates the small cells without leaving the tray submerged in runoff.
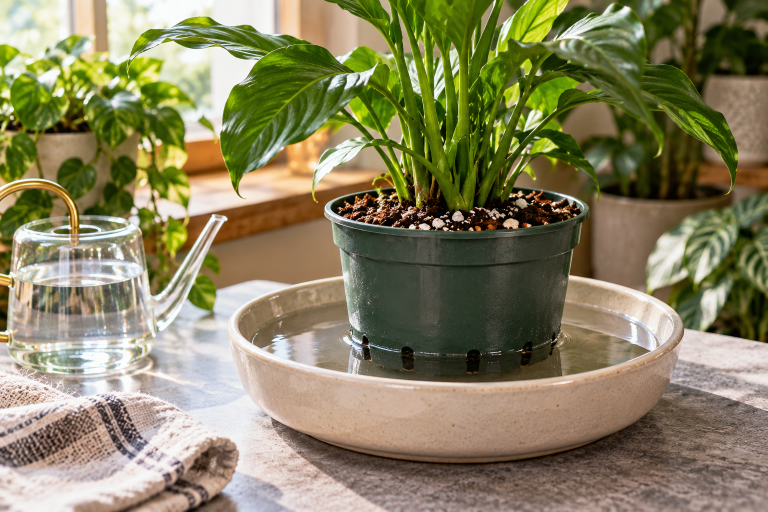
Empty reservoirs once the mix has absorbed what it needs. A tray that stands continuously in water is not necessarily safer for seedlings just because it prevents the surface from drying. Drainage and oxygen matter. Where a dome is used for germination, remove or ventilate it appropriately after emergence so humidity does not stay unnecessarily high around tender stems.
Temperature should match the crop, particularly during germination. A seed-starting heat mat can help with warmth-loving varieties in a cool home, but inappropriate heat can dry media or stress young plants. Measure temperature in the mix, not at the mat surface. Discontinue or adjust bottom heat when emerged seedlings require different conditions.
Provide adequate light promptly after emergence. A strong, stocky seedling is better equipped to establish than one stretching for a distant window. Arrange fixtures safely, follow their manufacturer’s instructions, and avoid introducing excessive heat from enclosed lamp-and-dome combinations.
Example: two trays with different outcomes
A gardener starts basil seedlings in an old plastic tray containing last year’s saved potting mix. The tray sits inside a decorative basin with water at the bottom. A clear dome remains in place after emergence. Within days, several seedlings have dark, narrowed stems and fall over. Next to them, a tray of lettuce in fresh mix remains upright.
The gardener does not assume that basil is inherently weak. Instead, the affected cells are removed and the old medium discarded appropriately. The tray is cleaned and disinfected before another sowing. Fresh seed-starting mix is used, drainage is checked, and the dome is handled according to the growth stage rather than left closed indefinitely.
Water is supplied in controlled amounts, and the basin is emptied after uptake. The tray is placed under adequate light once seedlings emerge. If the replacement basil grows well, the outcome is consistent with the value of improved sanitation and moisture management, though it does not identify the exact pathogen from the original failure.
A different case might involve healthy but long seedlings simply leaning toward a window. Those stems may lack rot at the base. Their main problem could be insufficient light rather than damping-off. Comparing cases prevents the owner from discarding healthy plants unnecessarily.
Why broad pesticide treatment is not a first response
Damping-off organisms are not all the same. Some are true fungi, while Pythium species are oomycetes (water molds). Products effective against one group are not automatically effective against another. Seedling age, crop use, label restrictions, and local law further complicate pesticide decisions.
In a small home seed tray, it is usually more practical to remove affected plants, improve sanitation, and restart with clean materials. Applying a strong chemical to a collapsing seedling does not restore rotten tissue, and it may expose the household to unnecessary risk. Always use only products labeled for the plant, site, and disease if professional advice indicates treatment.
Resist folk remedies such as sprinkling random kitchen powders, spraying bleach, or repeatedly soaking the surface with peroxide. A dramatic bubbling reaction is not proof that a pathogen was eliminated, and sensitive seedlings may be harmed. Document observations and change known risk factors before pursuing unverified cures.
A prevention plan for your next tray
Begin with clean containers and new propagation medium. Sow at the depth and spacing appropriate to the seed. Keep the medium moist but aerated and avoid repeated waterlogging. Match temperature to the crop and give emerging seedlings enough light. Remove a humidity cover when no longer needed, and inspect stem bases regularly while plants are young.
If disease symptoms appear, remove affected cells promptly and review the whole workflow instead of changing only one variable at random. Keep notes on the mix source, tray cleaning, watering schedule, and germination conditions. A record can reveal why the same corner of a tray fails repeatedly.
The sad sight of collapsed seedlings is easier to respond to when you treat it as a disease-risk problem rather than a mysterious lack of fertilizer. The damaged seedlings may not be salvageable, but cleaner materials and a better-rooted growing environment can make the next sowing much more successful.
References
University of Minnesota Extension — How to prevent seedling damping off
University of Minnesota Extension — Starting seeds indoors