Thrips on Houseplants: How to Spot Silvery Damage and Respond
A new leaf opens with strange silver streaks. A flower looks bruised before it fully unfurls. You may see a few tiny dark dots near the damage but no obvious insects. Thrips are one possible explanation—and one of the easiest pests to misidentify if you judge only by the finished leaf.
Thrips are small, slender insects that scrape plant tissues and feed on the contents. Their injury can remain visible long after the insect has moved. The most useful response is therefore not to identify every pale mark as thrips, but to examine where the damage began, look for the insects themselves, and monitor whether fresh injury continues. A measured response also protects nearby plants from unnecessary treatments.
Know what you are looking for
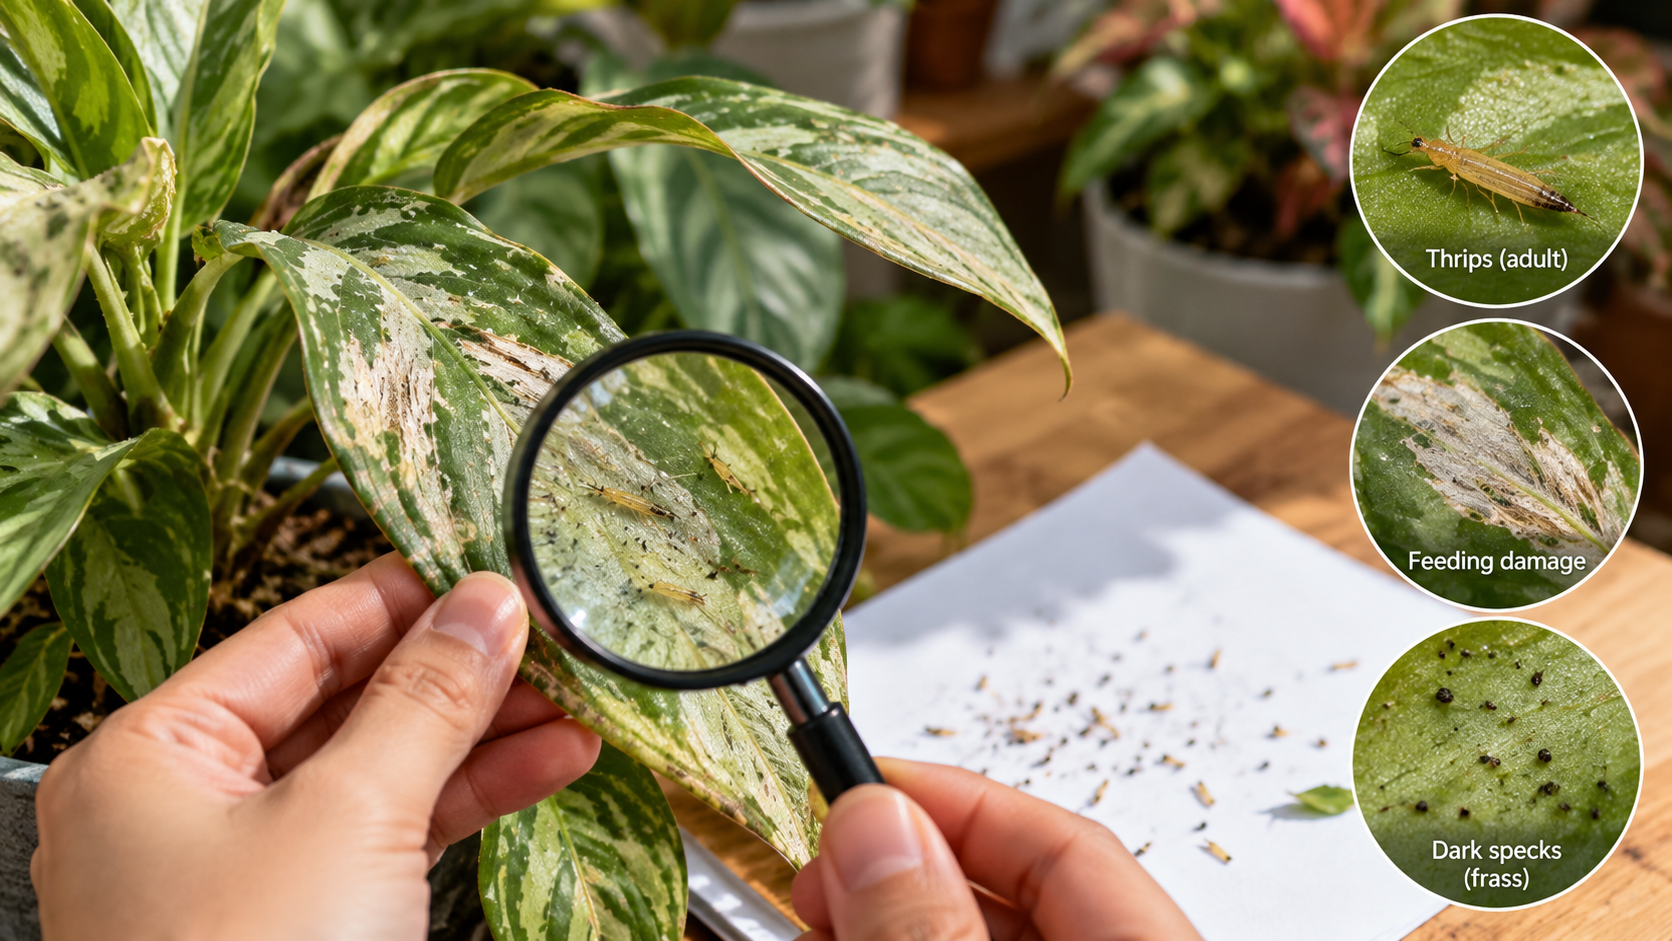
An adult thrips is typically narrow and elongated, often only around 1–2 millimeters long, although size and color vary by species. Some are pale tan, others brown or almost black. A moving thrips can resemble a short, thin dash rather than the rounded shape people expect from a houseplant pest. Adults may move quickly and some fly; juvenile stages are usually paler and cannot fly.
The insects frequently hide in new leaves, tight growing points, leaf folds, and flowers. On plants with large leaves, search both surfaces, especially near veins and protected edges. On a flowering plant, gently part the petals and look into the flower throat. A brief check of the most visible mature leaves can miss an active population sheltered inside new growth.
A small hand lens is helpful but not mandatory. Place a plain sheet of white paper beneath a flower or leaf and tap it gently. Watch for thin moving specks, then confirm under magnification if possible. This is a scouting technique, not a definitive identification of species. Distinguishing species sometimes requires a diagnostic laboratory, and that distinction can matter where different thrips species carry different plant diseases.
The University of Minnesota Extension guidance on indoor plant insects describes the combination of slender insects, silvery feeding damage, and dark fecal deposits that helps narrow the diagnosis. It is more reliable than searching for a single textbook photograph, because real injuries differ among hosts and stages of development.
Read the leaf damage as a timeline
Silvery streaks or irregular pale patches form where surface cells have been damaged. On some leaves, affected areas dry, become tan, or develop small dark spots. Tender leaves damaged before they fully expand may emerge twisted or scarred, making the problem look worse than it did when the insect was actually feeding. Flowers may have streaked petals, irregular edges, or brown sections.
Those marks are historical records. A leaf that was injured yesterday cannot become unscarred after the pest is removed. Consequently, taking daily photographs of the same damaged patch tells you little about whether control worked. Instead, photograph a newly emerging leaf or developing flower, record its condition, and compare the next flush of growth.
Small black dots near the feeding sites can be insect droppings, but dirt, fungal spots, and other pests can produce superficially similar specks. Look for a coherent pattern: silver feeding areas plus dark deposits plus an insect in a plausible feeding location. If the only evidence is one pale leaf, keep the diagnosis open.
Distinguish thrips from common look-alikes
Spider mites also discolor leaves, but their feeding often creates fine, repeated stippling; significant infestations can leave webbing, especially on the undersides or between leaves. Thrips are typically more elongated and their damage may be broader or streak-like. Mites are arachnids, not insects, and the control choices are not identical. Whitefly adults resemble tiny white moths and fly up in a cloud when foliage is disturbed. Mealybugs leave obvious cottony material, while some fungal and bacterial leaf diseases create spots without feeding insects.
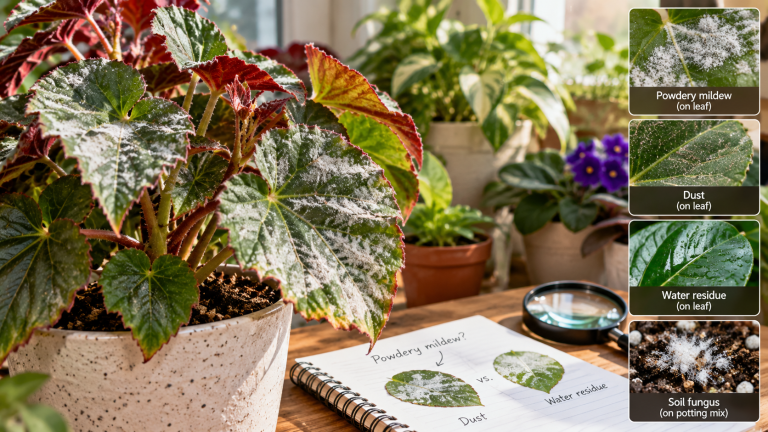
Sunscald produces pale or bleached areas on exposed leaves, but those patches usually correspond to a light change rather than continuing insect activity inside buds. Mechanical damage can also create silver-looking scars, especially where a leaf unfolded against a support, a window, or another leaf. Check whether the marks appeared immediately after moving, shipping, or cleaning the plant.
A useful test is to ask three separate questions. Is the symptom expanding on previously healthy new tissue? Can you observe a likely cause on that tissue? Did the damage begin before or after a change in light, handling, or growing conditions? Your answer may be uncertain on the first inspection. That uncertainty is a reason to monitor, not to apply three products at once.
Inspect the entire plant before deciding on treatment
Begin in good daylight and set the plant apart from the collection. Inspect the growing tip, curled leaves, undersides, flower buds, and the stem joints. Note which parts have active insects and which only show old injury. Remove dead flowers from the immediate area so there are fewer hiding sites, but do not strip away every healthy leaf to make inspection convenient.
Examine neighboring plants, especially those close enough to touch, those purchased at the same time, and flowering species that might attract or harbor pests. A new purchase can introduce thrips without obvious symptoms on arrival. For a new arrival, use a separate quarantine area with adequate light and easy access for inspection; do not rely on a calendar alone if fresh damage is still appearing.
Keep basic notes: the date, plant name, locations of injury, whether insects were actually found, and how many affected leaves or flowers were removed. This is much more useful than recording only “thrips—sprayed” because it preserves evidence for interpreting what happens next.
Start with isolation and targeted physical removal
Move the affected plant away from the main collection where practical, especially from flowers and tender new growth. Isolation reduces opportunities for insects to move between leaves of different plants. It is not a guarantee: some adult thrips fly and can move around a room. Position the plant somewhere you can inspect without carrying it through several plant shelves each day.
For a plant that tolerates water on its foliage, carefully rinse leaves and growing points using a gentle spray. Support flexible stems, avoid cold water shocks, and allow the crown and foliage to dry in a well-ventilated area. Rinsing can reduce exposed insects, but it may not dislodge those protected inside buds or tissues. Plants with velvety leaves, delicate flowers, or water-sensitive crowns require a gentler approach; do not assume every species should go under a shower.
Remove severely infested flowers or damaged shoot tips if that can be done without disfiguring or weakening the plant excessively. Seal and dispose of prunings rather than dropping them among other pots. Clean tools between plants. If a plant is weak, heavily infested, inexpensive to replace, and standing beside a valuable collection, discarding it can sometimes be the least harmful choice. There is no obligation to rescue every severely damaged specimen with repeated chemical treatments.
Understand what products can and cannot do
Chemical control is not a single universal recipe. Different thrips species, growth stages, host plants, and countries have different requirements. Insecticidal soap and horticultural oils are sometimes available for certain labeled uses; they generally require direct contact and sufficient coverage of exposed pests. Contact products may miss insects protected inside curled leaves or flower buds. Some formulations can spot or burn sensitive foliage, especially when combined with strong light or high heat.
Read the entire product label before using anything on an indoor plant. Confirm that both the target pest and the intended site of application are permitted, along with any plant restrictions, dilution instructions, protective equipment, ventilation, re-entry guidance, and local regulations. A product legally available for outdoor ornamentals is not necessarily approved for use in a living room. Do not improvise stronger concentrations because the insects are difficult to reach. Avoid mixing treatments or combining oils and sulfur unless the relevant labels specifically permit it.
Be cautious with broad-spectrum systemic products, particularly for plants that will later flower outside where pollinators visit. If treatment is necessary and the label is unclear, consult a local extension service, plant clinic, or appropriately qualified horticultural adviser. An accurate diagnosis and a registered use pattern are more important than a compelling online testimonial.
Use traps as evidence, not as the entire treatment
Blue or yellow sticky cards may catch flying adults and indicate whether activity continues near the plant. Their performance depends on placement, background, species, and room conditions; a trap with zero insects does not prove eggs or juveniles are absent. Conversely, a few insects on a trap do not establish that every silver patch in the room was caused by thrips.
Place a card where it will not trap pets or contact children, leave it in a consistent position, and check at a repeatable interval. Record a rough count and where insects were observed. Avoid moving the trap repeatedly to chase whichever spot looks most active. Many houseplant pests are best understood by comparing evidence from the card with close inspection of the plant itself.
Replace cards when dusty or full. Treat them as a monitoring instrument alongside inspection and cleaning, not a reason to neglect new leaves. Where beneficial insects are being used under specialist guidance, evaluate how trap use may affect that strategy.
Allow for the pest life cycle
Thrips do not all remain exposed on leaf surfaces. Depending on the species, eggs may be inserted into plant tissue, juvenile stages feed on leaves or flowers, and some later stages occur in protected places or the growing medium. That is one reason a single rinse or contact treatment may reduce visible insects without ending the problem.
Plan checks over several weeks rather than expecting overnight certainty. The interval should reflect the product label if treatment is used and the actual rate at which the plant makes new growth. In a warm room, inspect tender leaves and flowers frequently enough to notice early injury, but avoid physically handling fragile growing points so often that you cause damage yourself.
If new feeding marks appear after your first intervention, determine whether live thrips are still present. If symptoms recur repeatedly despite well-executed physical control, reassess the plant’s sheltered sites, nearby potential hosts, and the identification. Do not keep increasing pesticide concentration in response to a problem that may be coming from another plant or may not be thrips at all.
A two-week observation example
Suppose a philodendron arrives with one silvered leaf and two distorted emerging leaves. On day one you isolate it, inspect the underside and folds, find two slender moving insects, photograph the newest leaf, and remove one badly damaged leaf that is already dying. You gently rinse exposed foliage and clean the shelf. On day three you still see old scars, but no new insects. That is encouraging, not conclusive.
At the end of week one, a new leaf begins unfolding. You check its edges without tearing the sheath and photograph it from the same angle. At the end of week two, the leaf has expanded without fresh silvery patches and inspection reveals no active insects. That is stronger evidence of improvement than the continuing appearance of the original damaged leaf. Continue reasonable monitoring, particularly while buds or leaves are still opening.
If instead the new leaf develops fresh scarring and a live insect is found, the response has not adequately addressed the source. Repeat identification and review control options. If the new leaf is distorted but no insect can be found after several inspections, consider whether its injury developed before isolation, whether growth conditions changed, or whether another diagnosis is more likely.
Prevent a repeat introduction
Inspect plant purchases before bringing them home and pay particular attention to flowers and new growth. Avoid accepting visibly infested cuttings. When exchanging plants, communicate honestly about recent pests and isolate the new material before placing it among established pots. Keep shelves accessible so it is possible to examine the underside of leaves; tightly packed displays allow damage to go unnoticed.
Avoid treating every plant prophylactically. A clean collection benefits more from observant care, thoughtful spacing, and quickly isolating a problem than from routine pesticide application without a confirmed target. Wash hands and tools after handling an infested plant and dispose of suspicious prunings promptly. Improving light and plant vigor can help the plant tolerate stress, but it does not directly kill an existing thrips population.
When to seek a firm diagnosis
Contact a local plant diagnostic clinic if repeated damage continues but you cannot observe a pest, if flowers or young leaves collapse unusually quickly, or if you suspect a disease transmitted by insects. Save clear photographs of the symptom progression, both leaf surfaces, any captured specimens, and a concise treatment history. Those details give a specialist a much better starting point than “my leaves are silver.”
Thrips management is a process of testing a diagnosis and checking new growth. Confirm the insect, protect other plants, remove exposed insects where practical, use only properly labeled controls when needed, and judge success by the absence of new feeding injury. You cannot erase old leaf scars, but you can stop mistaking them for an infestation that is still growing.
References
University of Minnesota Extension — Managing insects on indoor plants