Growing Basil from Seed in a Windowsill Pot
Basil seeds can sprout quickly in a warm kitchen, making them appealing for a first indoor edible plant. The harder part is keeping the seedlings stocky and productive after they emerge. A crowded pot of tiny sprouts may look promising, then stretch toward the window and collapse or produce only a few weak leaves. A successful windowsill crop requires suitable light, gentle thinning, enough root room, and harvesting that encourages useful branching.
This guide focuses on raising culinary basil from seed through repeated small harvests, not on preserving a mature outdoor herb indefinitely. The steps are deliberately practical for a real home, where light shifts through the seasons and a pot beside the sink is not always the same as a warm sunny garden bed.
Select the basil type for your cooking and space
Sweet basil (Ocimum basilicum) includes familiar Genovese types, compact small-leaf forms, purple-leaved varieties, and cultivars with different aromas. Thai basil and lemon-scented types may be sold nearby, but flavor, habit, and eventual size can differ. Choose a culinary type you actually intend to use, and check whether the cultivar is compact enough for the available windowsill.
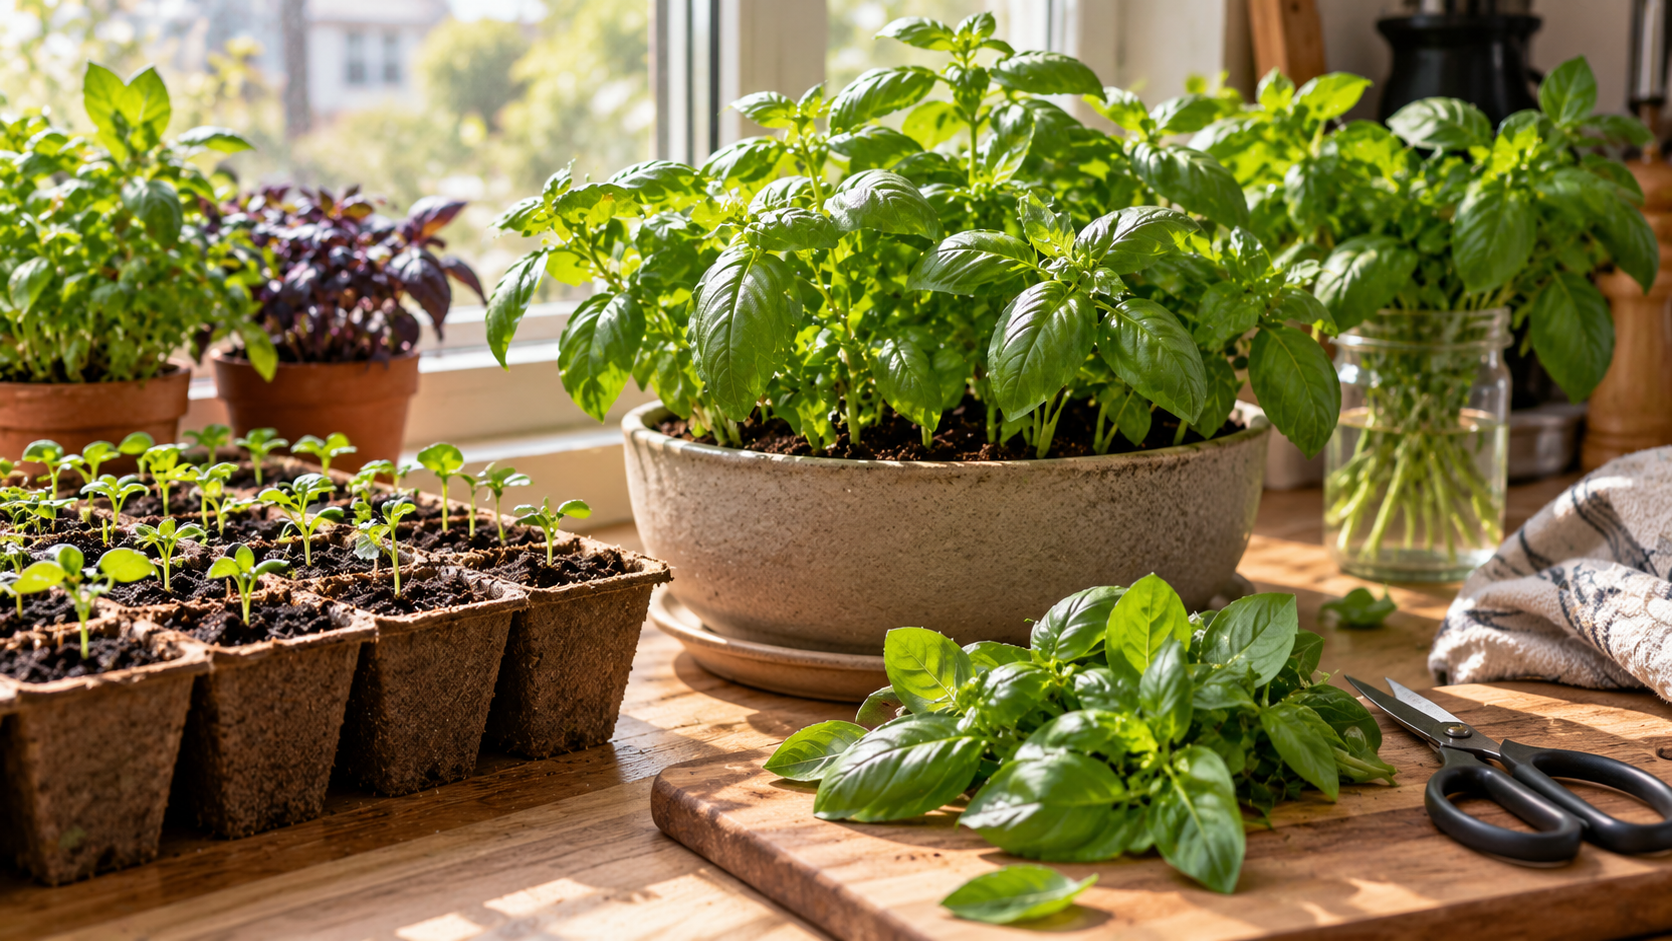
A broad pot with drainage holes can support several small basil plants if they are spaced appropriately; a very narrow decorative cup may become crowded almost immediately. Remember that seedlings will develop side shoots as they are harvested. Plan for the mature canopy, not just the dimensions of the seed packet.
The Penn State Extension basil guide describes basil as a warm-season culinary herb that grows well in containers and can be harvested repeatedly when cared for properly. This supports an indoor project, but it does not mean that a dark winter window will supply the light needed for vigorous growth.
If you are starting basil to later transplant outdoors, choose a sowing date compatible with the last frost and local climate. If the plant will remain indoors, focus instead on available light, temperatures, and a manageable pot, acknowledging that natural light may be limiting in some seasons.
Prepare a clean pot and suitable growing mix
Use a container with functioning drainage holes and an appropriate tray. A shallow, wide pot can be convenient for sowing, but make sure it allows enough root depth as plants grow. Avoid filling a sealed decorative container with soil and relying on a layer of stones as a substitute for drainage.
Choose a clean, fine but well-aerated seed-starting mix for initial germination or a suitable high-quality potting mix that does not contain large obstructive fragments. Old media from a diseased plant are not an appropriate starting material. Pre-moisten the mix so it is evenly damp without dripping, then fill the pot and firm it gently rather than pressing it into a hard block.
Sow seeds at the depth given on the packet, which is generally shallow for basil. Space them rather than creating a dense layer of seed across the entire surface. If germination is uncertain, sow a few extra seeds with the expectation that weak or crowded seedlings will be thinned later.
Label the pot with cultivar and date. This small step matters when you begin several herbs at once; two pots of emerging seedlings may look nearly identical until their characteristic leaves and aroma develop.
Give seeds warmth, then provide strong light
Basil germinates best in appropriately warm conditions. A cool window ledge can remain colder than the rest of the room, especially at night. Place the pot where the growing medium stays within the seed packet’s recommended range, and avoid drastic day-night swings or direct contact with a radiator.
A seed-starting heat mat may help in a cool home if used safely with a suitable controller and thermometer, but it is not essential in every room. Do not put an unprotected household heating pad beneath a wet pot. Excess heat can dry the thin layer of mix around seeds before germination is established.
After seedlings appear, light becomes urgent. A warm but dim environment encourages stems to stretch, creating long gaps and weak supports. Move seedlings to a bright, suitable window or use a properly placed horticultural grow light. The Penn State article on basil emphasizes sun and warmth for strong growth; under indoor lamps, the actual intensity and coverage still determine results.
A south-facing window may help in the Northern Hemisphere, and a north-facing one often offers corresponding exposure in the Southern Hemisphere, but curtains, overhangs, seasonal sun angle, and climate are crucial. Observe the actual light on your windowsill rather than applying a compass rule from another continent.
Water seedlings without washing them away
Basil seeds require consistent moisture while germinating, but the mix should not be saturated. Use a gentle stream or fine watering method that does not displace the tiny seeds. A tray-based soak may work if the medium wicks properly, with excess water removed afterward.
Do not judge moisture only from the surface color. A pot can look dry on top but remain wet around roots below. As seedlings grow, inspect the root zone and water thoroughly when needed. A small exposed windowsill pot can dry quickly on a sunny day, while the same pot in cool winter light may stay wet much longer.
Avoid leaving the pot standing in water inside a decorative sleeve. Constant saturation reduces aeration and can encourage root problems. At the other extreme, repeated complete drying may wilt tender basil and slow growth. Learn the pot’s weight and moisture pattern during normal days.
If a few seedlings collapse with a narrow, soft stem at soil level, investigate possible damping-off disease and overly damp conditions rather than immediately adding fertilizer. Clean materials, appropriate temperature, aeration, and light help reduce risk during this vulnerable stage.
Thin seedlings before they become a tangled clump
Retail pots of basil are often densely planted to look full when sold. That can be attractive for short-term use, but a seed-grown household pot intended for repeated harvests needs enough space for roots and branches. When seedlings develop true leaves, remove extra plants gradually until the remaining individuals have room to grow.
Cut weak or unwanted seedlings at soil level with small clean scissors if pulling would disturb neighboring roots. Do not feel compelled to save every sprout. A handful of strong plants may ultimately produce more useful leaves than a crowded cluster that struggles for light and moisture.
If the original sowing pot was very shallow, move selected young plants to a larger suitable container once they are robust enough. Handle root balls gently and avoid burying stems more deeply than appropriate. Transplanting is a change to manage, not a routine task to perform several times just because seedlings are growing.
Give plants clearance from the window glass and each other. If leaves press against cold glass or become shaded under taller neighboring pots, adjust the arrangement. Do not rely on rotating the pot to compensate for fundamentally insufficient light.
Pinch to develop branches rather than a single tall stem
Basil grows in pairs of leaves along stems. New side shoots can develop from nodes below a harvested tip. Once a plant is sufficiently established, pinching above a healthy leaf pair can encourage branching and a fuller canopy. The right timing depends on plant size and vigor; very tiny seedlings with only a couple of true leaves should not be stripped aggressively.
Observe a stem before cutting. Identify a pair of healthy leaves and a point just above it. Remove the growing tip cleanly, leaving enough foliage for continued photosynthesis. As new branches expand, similar selective harvesting can be repeated when the plant is vigorous.
Cutting too low on a weak plant can remove nearly all its growing area. On a healthy established pot, more frequent modest harvests may be preferable to suddenly removing most of the leaves for one meal. A small windowsill plant has limited reserves compared with a large garden-grown specimen.
Penn State Extension describes repeated pinching and harvesting as a practical way to encourage basil’s leafy growth. That advice does not mean that pruning can compensate for low light. If stems stay weak, improve the environment rather than repeatedly removing every new tip.
Handle flowers according to your harvest goal
Basil eventually develops flower buds, especially as plants mature under suitable conditions. Flowers can be attractive and useful to pollinators outdoors, but a grower focused on tender culinary leaves may prefer to pinch emerging flowering tips to maintain leafy growth.
Do not treat the first flower as proof that the entire plant is ruined. Flavor and texture can change with development, but healthy leaves may still be useful. Decide whether you want continued leaf production, seed saving, or flowers for a pollinator-friendly pot, and manage the plant accordingly.
A compact indoor pot pushed into flowering by stress may also have other limitations. Check watering, heat, age, and light conditions rather than simply cutting buds every day. Pinching helps shape growth, but it does not eliminate the plant’s developmental cycle.
If the plant becomes woody and less productive with age, starting a fresh sowing may be more practical than trying to preserve one exhausted plant indefinitely.
Manage pests and disease on an edible windowsill crop
Indoor basil can develop aphids, whiteflies, fungus gnats, or diseases depending on growing conditions. Check new growth and the undersides of leaves regularly. Sticky residue may indicate a sap-feeding insect; distorted growth can have several causes and should not be diagnosed from a single leaf.
Basil downy mildew is a specific concern in some regions. Yellowing leaves with grayish growth underneath may indicate the disease, which can spread rapidly. The University of Minnesota Extension overview of basil downy mildew discusses resistant cultivars and the importance of airflow and leaf-drying conditions.
Do not apply unlabeled indoor insecticides to herbs intended for food. If a product is genuinely needed, it must be legal and labeled for edible basil under the applicable conditions, and all harvest precautions must be followed. Often a small diseased pot is easier to discard and restart than to expose household members to unnecessary treatments.
Use clean scissors for harvest and wash leaves appropriately before eating. Keep pots away from contaminated sink splash zones, cleaning sprays, and surfaces used for raw meat or other potentially hazardous kitchen activities.
A case: basil that sprouts but never becomes bushy
A cook sows a full seed packet into a small glazed bowl with no drainage. Dozens germinate and form a dense green patch. The bowl sits two meters from a window, and the cook gives a splash of water every morning. Within weeks the stems are long and weak, some seedlings collapse, and few usable leaves develop.
For the next attempt, the cook uses a draining pot with a clean suitable mix and sows more sparingly. Seedlings are kept warm for germination, then moved to a brighter window or an appropriate grow light. Weak extras are snipped as true leaves appear, leaving space for the best seedlings.
Watering is based on the root-zone condition, with excess allowed to drain. Once the remaining plants are vigorous, their tips are pinched selectively above leaf pairs. The pot gradually produces branching stems suitable for small repeated harvests. This is not a guarantee of endless basil, but each change addresses a visible cause of poor growth.
If the apartment’s winter light is extremely weak, the cook may choose an indoor fixture or accept that basil production will be modest until sunnier conditions return. Seasonal honesty is more useful than promising unlimited harvests from a dim shelf.
Harvest for flavor without exhausting the plant
Cut clean young leaves or stem tips as needed for meals. Prefer taking modest amounts from multiple strong shoots instead of stripping one plant bare. Remove damaged or unclean leaves before use, and avoid harvesting from plants that have recently received a treatment not permitted for edible crops.
Basil is often best used fresh and can be sensitive to chilling during storage. The Minnesota Extension harvesting guide discusses keeping basil appropriately rather than assuming refrigerator storage is always optimal.
If you have more leaves than you can use immediately, choose a food-safe preservation method such as freezing or appropriate drying. Follow established food-safety instructions, particularly for basil stored in oil, which can create serious risks if handled incorrectly. A gardening article should not invent room-temperature storage instructions for herb-in-oil mixtures.
A weekly care checklist
Check the light reaching the canopy, not only the location of the pot. Feel the medium below the surface before watering. Look for insects and suspicious leaf symptoms while harvesting. Pinch established shoots above healthy nodes when appropriate, and remove excess seedlings or weak growth before crowding becomes severe.
Keep a small record of cultivar, sowing date, first true leaves, pinching, and harvest. If one variety remains compact and productive on your particular windowsill, it may be a better long-term choice than a taller cultivar that needs more light and root room.
The most successful basil pot is not the one with the most seedlings on day seven. It is the one that still has healthy stems and a manageable canopy weeks later. Warm germination, adequate light, thoughtful thinning, and regular restrained harvest create that opportunity.
References
Penn State Extension — Herb Garden Plants: Basil
Penn State Extension — Basil, A Summer Favorite
University of Minnesota Extension — Basil downy mildew
University of Minnesota Extension — Harvesting and storing home garden vegetables