Growing Oyster Mushrooms Indoors With a Ready-Made Kit
The first thing an oyster mushroom kit grows is not a mushroom. It is a network of fungal mycelium already established inside a prepared block. When conditions are suitable, small clusters can emerge from the exposed surface, develop broad caps, and become a modest edible harvest. If you expect the kit to behave like a potted herb—sunlight, fertilizer, and a watering can—you may accidentally work against the biology that makes it productive.
A ready-made kit is a useful way to observe that process without preparing sterile substrate or inoculating it yourself. It can fit on a washable shelf in an apartment, but it still needs appropriate humidity, ventilation, cleanliness, and a safe food-handling routine. This guide covers a commercially prepared edible Pleurotus kit, not identification of wild mushrooms or home laboratory spawn production.
Understand what is inside a mushroom-growing kit
Oyster mushrooms are fungi, not green plants. They do not obtain energy by photosynthesis, and their food comes from organic material colonized by the mycelium. A kit typically contains a substrate such as prepared straw, sawdust, or another suitable material that a producer has already inoculated and allowed to colonize. The white fungal growth inside a healthy prepared block is not equivalent to white mold on random household waste.
The species and strain matter because different oyster mushrooms tolerate somewhat different temperatures and conditions. A pink oyster kit may behave differently from a pearl or blue oyster kit. The seller should identify the edible species or cultivated variety, provide a clear fruiting procedure, and state reasonable storage and expiration instructions.
The Utah State University Extension guide to growing mushrooms at home explains mycelium, substrate, fruiting bodies, fresh-air exchange, and contamination control. Much of that guide describes more advanced methods than a prepared kit requires. You do not need to build a sterilization laboratory or copy monotub instructions when the manufacturer has already completed colonization.
Choose a kit marketed by a reputable edible-mushroom cultivator rather than a mystery block without a species name. Avoid collecting fungi from outdoor logs and treating them as if they were the same product. Appearance alone is not an adequate food-safety test for unknown mushrooms.
Check the kit before opening it
Read the entire manufacturer instruction sheet while the package is still closed. Some kits are activated by cutting an opening in a marked panel; others already have an exposed growth window. Some require an initial soak, while others recommend misting only the opening or a humidity tent. Using instructions from a different product can flood or dry your particular block.
Look for damage to the package, unusual leaks, a distinctly rotten smell, or suspicious spreading colors that the manufacturer does not describe as normal. A white colonized block may be expected, but green, black, or other unexpected fuzzy patches can indicate contamination. Color by itself does not identify a mold species, and a householder should not attempt a laboratory diagnosis by sniffing or disturbing suspect growth.
If contamination is suspected before opening, contact the seller with clear photographs of the sealed kit. Keep it isolated from food preparation areas and other cultivation projects while seeking guidance. If the producer advises disposal, seal the block and follow local waste rules. Do not eat mushrooms from a block with unresolved contamination or try to rescue it by spraying household disinfectant on the substrate.
Check the package date and storage history if known. A product left in a hot delivery vehicle may behave differently from a fresh kit kept as instructed. A kit is not guaranteed to fruit on a particular day merely because the advertising photograph shows a dense cluster.
Pick a location for humidity and clean air
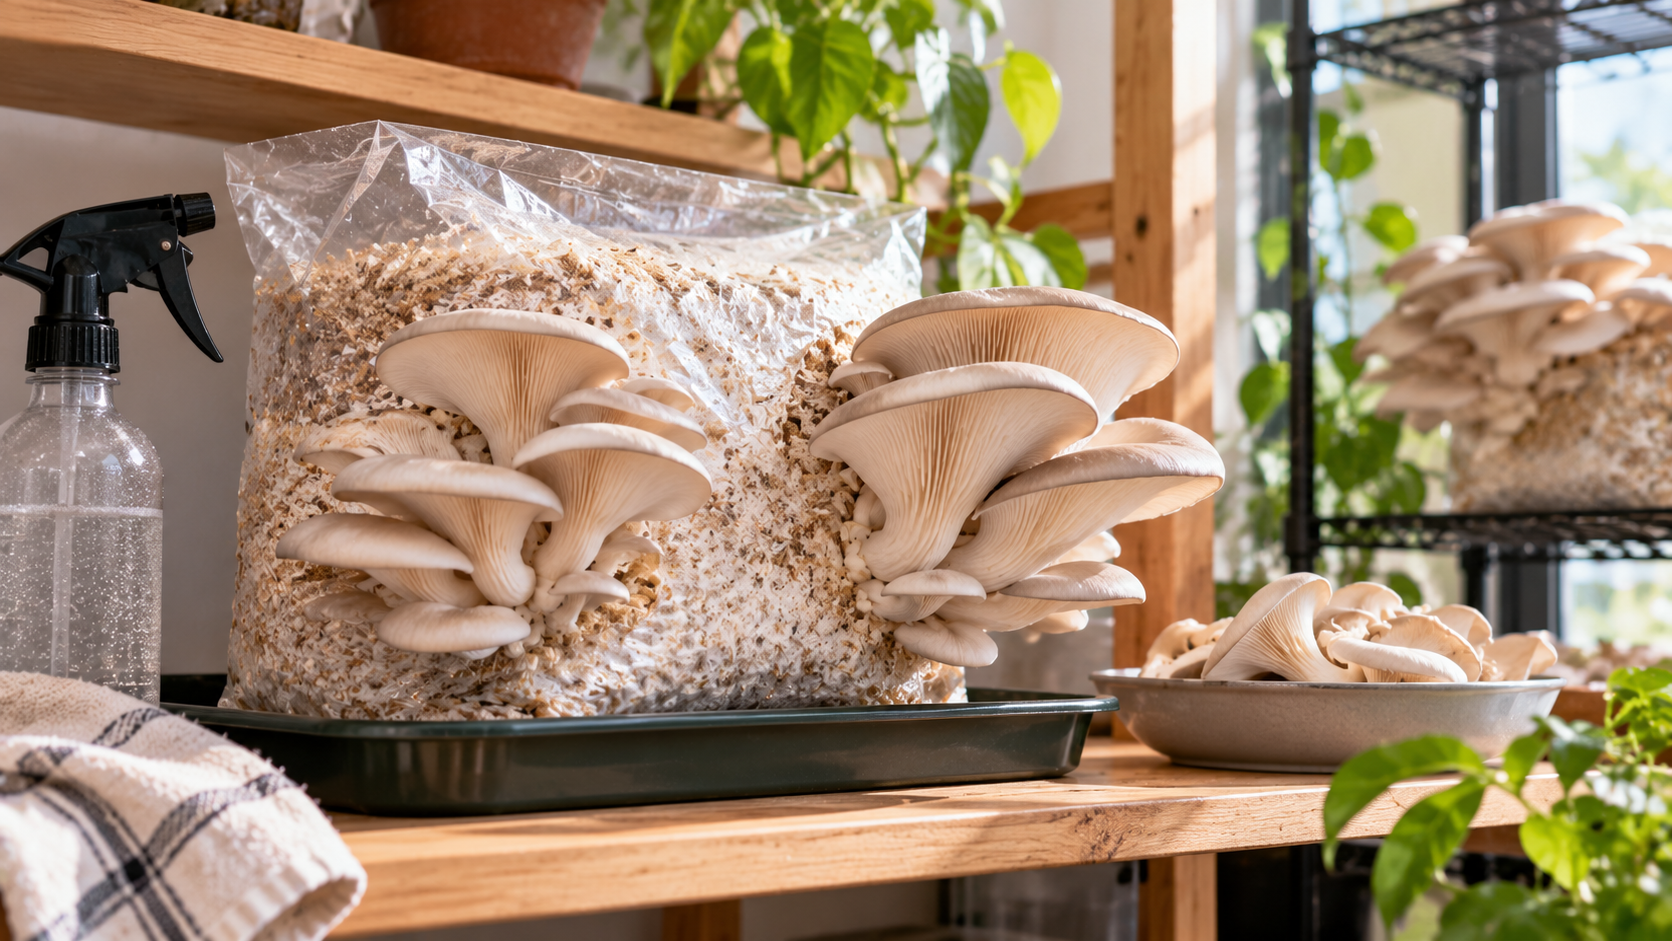
A shelf with a wipeable tray near an appropriate window can be convenient, but the best location is not necessarily the sunniest one. Oyster mushrooms respond to some ambient light as an environmental cue; direct intense sun can overheat or dry the exposed substrate. Use bright indirect light or whatever low-heat lighting the specific kit recommends.
The fruiting block also needs fresh air. Fungal respiration produces carbon dioxide, and restricted exchange can affect cluster shape and development. An enclosed cupboard with no ventilation is therefore not automatically a good humidity chamber. At the same time, a fan blowing continuously on the exposed block may dry tiny pins faster than they can expand.
Choose a spot away from household cleaning aerosols, cooking grease, pet access, and dusty ventilation outlets. If someone in the home has asthma, mold sensitivity, or a significant respiratory condition, consider their exposure before growing spore-producing mushrooms indoors. A small kit can release spores as it matures, particularly if clusters are left unharvested. Suitable placement and timely harvest are more important than assuming indoor mushroom spores are harmless to everyone.
The University of Florida IFAS oyster-mushroom growing guide discusses fresh-air exchange and humidity for a controlled substrate system. Those principles are useful background, but exact commercial grow-room humidity numbers should not become a universal rule for every countertop kit. Follow the kit’s instructions and use the actual condition of the developing clusters to guide small adjustments.
Open and activate only as directed
Wash your hands, clean the intended shelf or tray, and prepare the materials listed by the kit producer. Use clean scissors or a clean blade if an opening must be made, and avoid slicing deeply into substrate unless instructed. The opening is where the fruiting body is expected to develop; a random pattern of extra cuts can expose the block to drying and competing organisms.
If the kit uses a plastic humidity cover, position it as described and check that it does not press against young mushrooms. A cover can slow moisture loss, but it needs the air-exchange arrangement specified by its maker. A sealed bag filled with stagnant air is not necessarily safer or more productive than a properly vented setup.
If an initial soak is required, use the prescribed water source and duration rather than leaving a block immersed indefinitely. Excess standing water creates a sanitation problem and may compromise air spaces in the substrate. Other kits explicitly say not to soak at activation. Treat the instruction sheet as product-specific guidance, not a suggestion to improvise.
Write the activation date on a note next to the kit. That record matters when deciding whether the kit is merely slow or conditions have changed significantly.
Keep the exposed area moist without saturating everything
A fruiting opening must not dry so thoroughly that young pins abort, but visible puddles are not a sign of success. When the kit instructs you to mist, use clean equipment and direct moisture where specified. A light mist can help maintain local humidity; repeated spraying into a growing cluster or water collecting in folds of plastic may encourage breakdown and contamination.
Consider the room, not just the misting schedule printed online. A heated apartment in winter may have very dry air. A humid coastal room may need less added moisture, while still requiring ventilation. Observe the exposed surface and small developing structures rather than spraying at fixed intervals regardless of conditions.
If caps develop dry edges or young clusters stop expanding, insufficient moisture or excessive airflow may contribute. If the surface stays slimy, smells bad, or collects large droplets for long periods, excessive wetness and poor ventilation deserve attention. Neither symptom can be diagnosed confidently from a single photograph without the kit’s expected appearance and strain.
Use a clean tray to protect furniture and empty any incidental water. Avoid a large shared humidifier that wets walls or woodwork; household mold growth is not a worthwhile tradeoff for one small mushroom harvest. In a small apartment, localized humidity control with appropriate ventilation is usually more manageable than altering the entire room.
Recognize healthy pins and developing clusters
Oyster mushrooms often begin as small clustered pins. Their stems and caps change rapidly when the environment is favorable, but the pace depends on species, temperature, block maturity, and moisture. Rather than relying on a rigid day-by-day promise, photograph progress and compare with the producer’s strain-specific examples.
Young caps may be curled or relatively small, then broaden as they mature. Long, thin stems with unusually small caps can indicate inadequate fresh-air exchange in some growing conditions. Do not correct that by pointing a powerful fan directly at the cluster; increase suitable airflow gently while protecting humidity.
Substrate size and available resources limit how much a block can produce. Advertising images are often selected from successful harvests, not an average household result. Keep expectations modest and focus first on the health and safety of the crop.
Avoid frequent handling of pins. Skin oils, dirty tools, and accidental pressure can damage delicate clusters. When an area looks unusual, review the kit instructions and contact the seller instead of repeatedly opening the block to investigate.
Harvest at the stage appropriate for the strain
For many oyster varieties, harvest occurs when the caps have expanded well but before they become very flat, fragile, or heavily spore-producing. The exact preferred stage varies by type and the manufacturer’s guidance. Do not wait indefinitely because you hope every cap will become larger; older mushrooms may dry, release more spores, or decline in quality.
Use clean hands and equipment. Depending on the kit directions, grasp the cluster close to the base and gently twist it free or make a clean cut with a suitable knife. Avoid scattering substrate fragments onto the food. Trim away attached substrate and discard any visibly damaged or questionable specimens.
Place harvested mushrooms in a clean food-safe container. Refrigerate promptly according to reliable food-storage guidance and use them while fresh. Do not leave a freshly harvested, moist cluster at room temperature all afternoon as a display. Cook cultivated oyster mushrooms thoroughly using a suitable recipe; raw or undercooked mushrooms are not a good default for this project.
Penn State Extension’s consumer guide addresses refrigeration, preventing cross-contamination, and discarding damaged produce. A kit’s edible identity does not remove the need for clean surfaces, appropriate storage, and safe preparation.
Decide whether a second flush is worthwhile
A flush is a group of mushrooms developing from the block over a period of time. After the first harvest, a kit may produce another cluster if the remaining substrate has enough resources and the producer’s rehydration and resting instructions are followed. Not all kits produce a second flush, and output commonly changes.
Remove leftover stems or damaged tissue as directed, keep the environment appropriate, and note the date of the first harvest. If rehydration is recommended, follow the specific procedure rather than soaking continuously. Avoid adding kitchen scraps, fertilizer, coffee grounds, or random soil to a spent kit. Those materials have not been prepared under the sanitary conditions required for safe mushroom production.
A kit with no new pins after an expected interval is not necessarily worth increasingly elaborate interventions. Check the temperature range, water management, age, and visible condition. Ask the supplier for strain-specific advice if the block still appears sound. When it is exhausted, dispose of it responsibly instead of keeping deteriorating organic material indoors.
Some spent substrate may be suitable for an outdoor compost system if local rules permit and there is no suspected contamination. Do not spread a questionable block into edible plant containers or indoor potting soil. The safest exit for a contaminated product is usually contained disposal according to the supplier and local waste guidance.
When to stop rather than troubleshoot further
Unusual mold growth, strong off-odors, persistent slime, widespread insect activity, or symptoms of irritation in household occupants change the decision from maximizing harvest to protecting health. Stop handling the kit casually. Keep suspect material away from food and seek advice from the supplier; dispose of it safely when recommended.
Do not taste uncertain mushrooms to determine whether they are safe. Do not compare an unknown outdoor fungus with a kit photograph and assume it is edible. Do not spray fungicides or bleach onto mushrooms you plan to eat. Cultivated food safety begins with an identifiable edible strain and a credible supply chain.
If household humidity is causing moisture damage around the shelf, move or discontinue the project. A beginner should be able to stop without embarrassment. One harvest that teaches clean handling and observation is more valuable than trying to maintain a damp, deteriorating block for a third flush.
A practical observation log for one shelf
Setup day: Note kit strain, producer, activation date, room location, and the directions used. Photograph the opening and identify where you will collect accidental water. Make sure the kit is away from cooking splashes and cleaning products.
First visible growth: Check the shape of the developing pins and whether the area feels consistently humid without standing liquid. Compare ventilation and temperature with the manufacturer’s instructions. Record changes instead of varying misting, lighting, and position all at once.
Expanding cluster: Watch cap development and the emergence of any elongated stems. Verify that the air-exchange setup is functioning. Keep curious children or pets from touching the edible crop, and prepare a clean harvest container before the mushrooms mature.
Harvest and reset: Harvest at the recommended stage, refrigerate promptly, and cook before consumption. If the kit allows a second flush, follow its resting and rehydration guidance. If new odors or suspicious growth appear, do not preserve the block merely to obtain a larger total weight.
This log supports useful decisions but does not guarantee a harvest. A kit is a small biological production system, not a houseplant that can be left indefinitely with occasional water.
What success looks like in a small apartment
A sensible result is one or more clean, identifiable clusters grown without excessive household humidity, followed by safe harvest, cooking, and prompt handling of the remaining block. Some kits are more productive than others, and different strains require different conditions.
The main advantage of a reputable oyster mushroom kit is that the technically demanding inoculation stage has been completed before you open the package. Your role is narrower but still important: provide the recommended fruiting environment, notice contamination warning signs, and handle food properly. That combination turns a shelf experiment into a worthwhile, realistic indoor-growing project.
References
Utah State University Extension — A Beginner’s Guide to Growing Mushrooms at Home
University of Florida IFAS — DIY FunGuide: Grow Your Own Oyster Mushrooms at Home
Penn State Extension — Preparing and Preserving Mushrooms