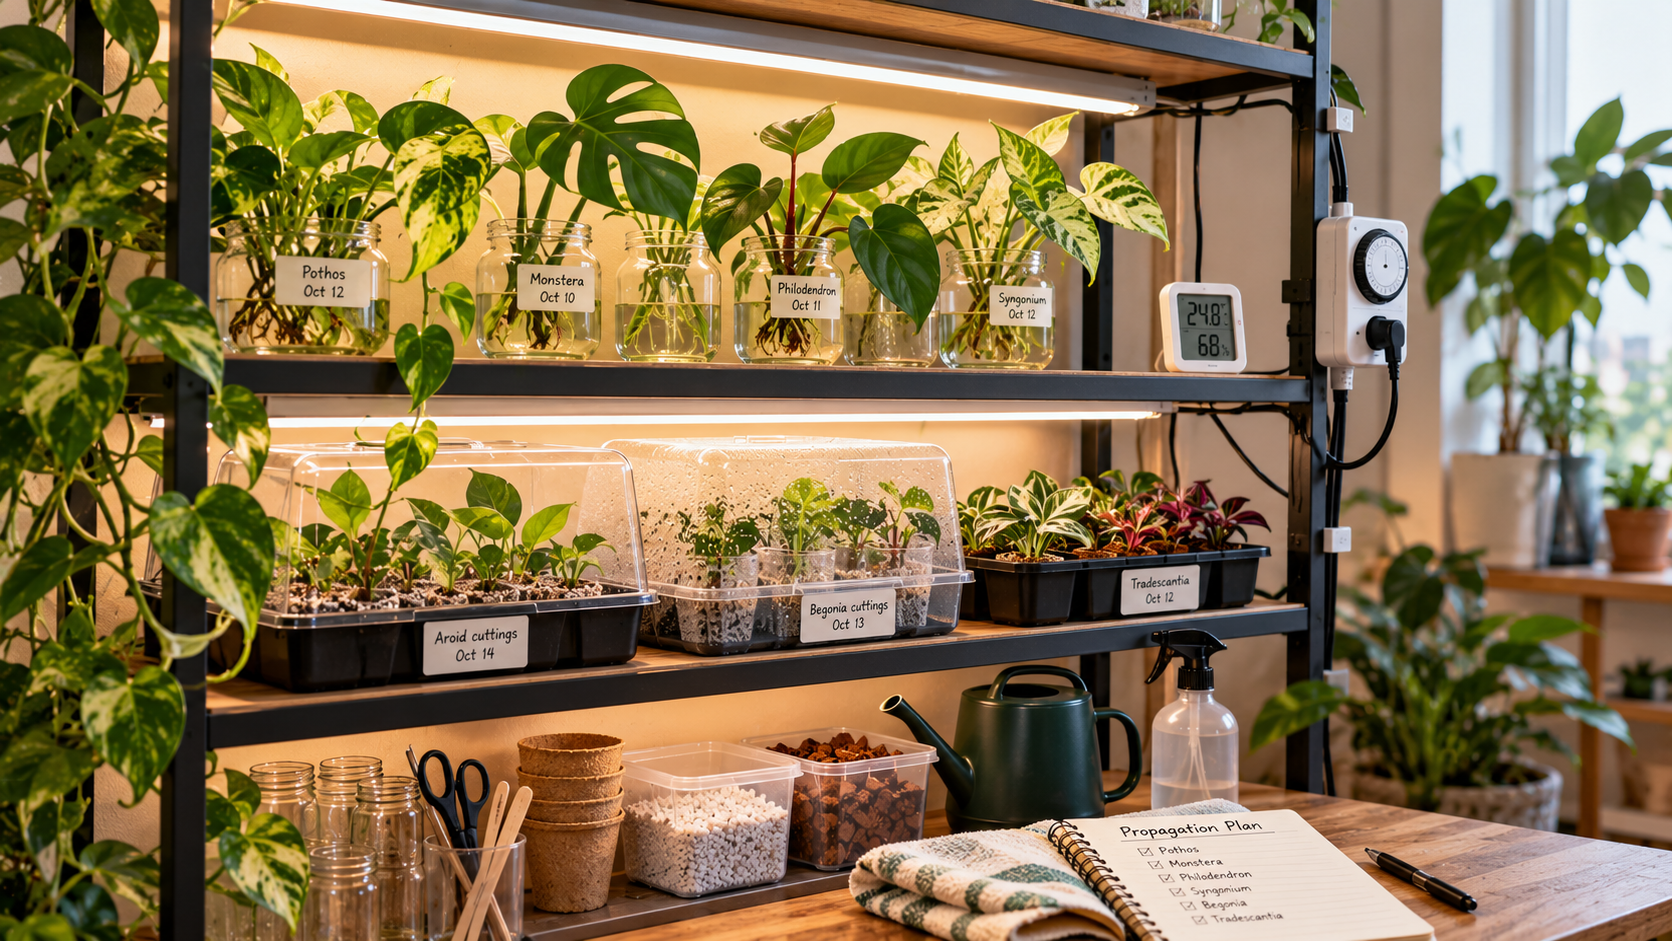
How to Set Up a Compact Indoor Propagation Shelf for Cuttings
A propagation shelf is useful when jars, small pots, and rooting trays have taken over a windowsill. The purpose is not to build a miniature greenhouse packed with gadgets. It is to give cuttings enough light, a stable environment, clean working space, and easy access so you can notice problems before they spread. In a small apartment, the quality of the setup is often determined by what you can reach and maintain, not by how many trays you can squeeze onto one shelf.
Stem cuttings have a limited or developing root system. That makes moisture management and leaf water loss especially important. A shelf can support consistent conditions, but no amount of equipment compensates for a cutting without a viable node or for an infected stem placed in a constantly wet medium.
Choose the shelf location before buying equipment
Start with a level, stable surface protected from household traffic, curious pets, and splashing water near electrical outlets. A narrow shelf can fit in a bright room, but it must have enough clearance for hands, watering tools, and eventual plant growth. If it sits beside a cold window, measure or observe the actual temperature at shelf level rather than assuming the room thermostat reflects conditions near the glass.
Avoid positioning the shelf directly under a heater or air-conditioning vent. Warm moving air can dry cuttings quickly, while strong cold drafts can slow rooting. A little gentle room airflow helps prevent stagnant condensation, but an oscillating fan blowing continuously onto small unrooted cuttings may increase water loss. Choose a location where the environment is reasonably predictable.
Keep the shelf low enough to inspect without leaning over an unsafe stack of furniture. Put heavy water containers on lower levels, and secure the shelf if tipping is possible. A propagation station that obstructs an exit or relies on overloaded extension leads is not worth the extra growing area.
Work out the light requirement
Bright indirect window light may be enough for many easy houseplant cuttings, including pothos. If natural light is weak or inconsistent, a suitable grow light can make the station more reliable. However, a desk lamp is not automatically designed for horticultural use, and the perceived brightness of a room is not a reliable measure of plant-usable light.
Follow the grow-light manufacturer’s instructions for safe mounting, distance, ventilation, and operation. A lamp positioned too close can cause heat or excess light stress; one too far away may not help much. Cuttings generally need enough light to maintain healthy leaves but may not have the roots to support intense exposure. Avoid running lights continuously. Plants respond to a balance of light and dark, and the appropriate photoperiod depends on plant type and available daylight.
For equipment choices and the meaning of brightness, see RootLuma’s grow-light guide. On a propagation shelf, adjust the lamp position as cuttings grow taller, and make sure tall pots do not shade all the shorter ones. Test the actual arrangement before assuming one strip light will serve every shelf tier equally.
Select containers according to the rooting method
Water jars allow visible inspection of roots but can spill if crowded at the edge of a shelf. Choose stable vessels with enough opening to remove roots without breaking them. Label each jar with species and cutting date. Keep leaves above the waterline and replace cloudy water as needed.
For soil or media propagation, shallow cells and small pots with drainage holes allow a more controlled root zone. Fine, lightly aerated propagation medium is generally more suitable for small emerging roots than very coarse chunks that leave inconsistent contact. Pre-moisten media to an appropriate level before inserting the cutting, then monitor rather than flooding each tray daily.
A removable waterproof tray under pots is valuable. It catches incidental runoff without turning the entire shelf into a standing-water basin. Empty collected water promptly. Inexpensive plastic trays can work well if sturdy, easy to clean, and sized so pots do not fall as the tray moves.
Manage humidity without sealing problems inside
Some soft cuttings benefit from temporarily higher humidity because they lose water before roots can replace it. But a sealed clear dome can also hold persistent condensation, reduce airflow, and encourage decay. The right decision depends on species, leaf surface, room conditions, and whether the cutting is already rooting.
Begin with easy, robust cuttings in ordinary room conditions if those conditions are suitable. Add a ventilated cover only when water loss warrants it and you can inspect it. Open or adjust the cover when excessive condensation forms, and do not allow leaves to press continuously against wet plastic. A full shelf should not be maintained at tropical-greenhouse humidity simply because a few cuttings need protection.
Avoid placing a household humidifier directly above lights or outlets. Water and electricity need physical separation, and increased humidity should not create wet walls or electrical equipment. A quiet, breathable room is often a better environment than a sealed cabinet that requires constant rescue cleaning.
Electrical safety is part of the design
Route cords so drips from watering cannot travel into plugs or power strips. Keep electrical connections above potential spill areas, provide drip loops where appropriate, and use fixtures rated for the environment in which they operate. Do not overload outlets or daisy-chain extension cords. Follow local electrical safety requirements and the manufacturer’s installation instructions.
A timer can simplify light consistency, but it should be suitable for the lamp and outlet. Check that the light is not overheating the shelf material, particularly when using compact wooden furniture. Keep a clear air gap where the fixture requires ventilation and do not drape fabric or foliage over drivers and heat sinks.
Before cleaning trays or changing equipment, disconnect power as appropriate. A shelf that is safe and easy to wipe down will be used more consistently than a collection of exposed wires threaded through wet propagation containers.
Design a routine that fits a small home
Group cuttings by similar needs rather than by how attractive their jars look. Water-rooted vines may be on one level, established pots below, and humidity-sensitive cuttings in a small ventilated section. Separate visibly diseased or pest-infested material; a propagation shelf should not become a recovery ward where problems spread through touching foliage and shared tools.
Use reusable labels. For each cutting, record the species, the date, whether it is rooted in water or medium, and what signs indicate readiness for potting. The RootLuma guide to building a healthy plant corner provides broader ideas about access and light; a propagation shelf adds the need to handle fragile developing roots and frequent small inspections.
Shelf element Main job What to check
Stable shelving Holds trays securely No tipping, adequate clearance
Suitable light Supports photosynthesis Distance, heat, duration, plant response
Draining cells or jars Supports the rooting method Node placement and root condition
Catch trays Protects furniture No standing water left beneath pots
Labels Prevents confusion Plant name, method, date
Cleaning supplies Limits debris and cross-contamination Tools cleaned between suspect plants
A 20-minute weekly reset
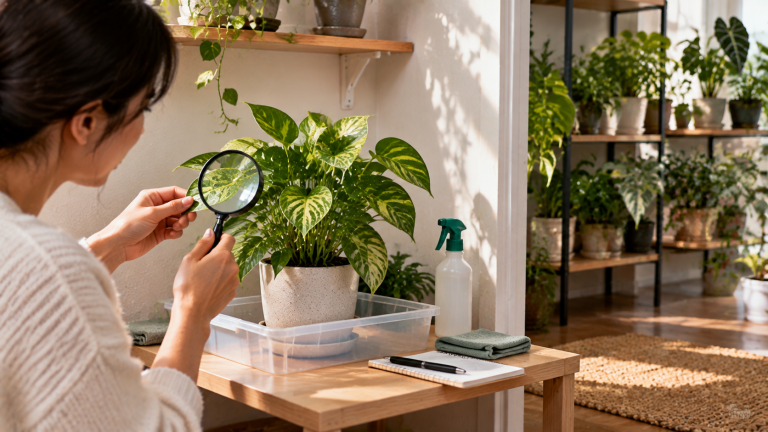
Remove dead leaves and failed cuttings, rinse dirty jars, empty trays, and clean obvious spills. Inspect the underside of leaves for pests and check whether any roots are ready for a permanent container. Adjust light height if the tallest cuttings have grown significantly. Review labels and discard records that do not help with decisions.
This is also a good moment to ask whether the shelf is overcrowded. A cutting that has rooted successfully should not remain squeezed into a temporary cell indefinitely. Pot it appropriately, share it with someone, or move it to a regular growing area. A propagation shelf works best when new plants move through it rather than accumulating forever.
Avoid these common setup mistakes
Buying high-powered lighting before measuring space. Oversized fixtures can create unnecessary heat and cost. Start with the shelf dimensions, species requirements, and mounting clearances.
Sealing every cutting in plastic. Some cuttings tolerate ordinary room air, while others need carefully managed humidity. Persistent condensation is a reason to reassess ventilation.
Using one watering schedule for all trays. Rooted and unrooted cuttings differ, as do water jars and media pots. Check their actual conditions.
Overcrowding trays. Touching leaves complicate pest detection and reduce access. A small open area for handling containers is valuable.
Putting electrical equipment below watering areas. Design against spills before the first pot is filled. No successful rooting result compensates for an unsafe power setup.
An example layout for a narrow shelf
Suppose you have a stable two-tier shelf near an east-facing window. Put lightweight water jars in a contained tray on the accessible upper level, away from the outer edge. Place small draining cells on the lower level where runoff is contained. If supplemental light is needed, mount it with adequate clearance and keep wiring separate from water paths. Use a small box beside—not on—the shelf for clean scissors, labels, and a cloth.
Begin with fewer cuttings than the shelf can theoretically hold. This leaves room to inspect each leaf and remove jars without bumping neighbors. When a new cutting roots, move it promptly to an appropriate pot. The result is a calm working area rather than a decorative grid that cannot be maintained without knocking something over.
Design for clean transitions between propagation stages
One of the most overlooked tasks on a propagation shelf is moving a cutting out at the right time. A water-rooted pothos that has formed healthy roots is not necessarily ready to live forever in a crowded jar. A seedling with roots filling a starter cell may need a larger container. Establish a clear place for cuttings that are newly started, those showing roots, and those already transferred into ordinary potting mix.
Labels should show both cutting date and potting date when those events differ. This makes it easier to explain why one cutting is stable while another has wilted after transplant. Move established plants off the shelf when possible; otherwise, large leaves begin blocking the light intended for the next batch of small cuttings. A shelf that never empties gradually stops functioning as a propagation station.
Protect cuttings from cross-contamination
Do not repeatedly reuse stagnant water from a failing jar for healthy cuttings. Remove decaying stems promptly, wash containers before reuse, and keep tools clean. If mealybugs or mites appear on one propagation, isolate it from the shared tray while you assess the problem. Healthy cuttings are often delicate, and treating the whole shelf with a broad spray can cause more damage than a localized pest problem.
Cuttings received from other people deserve a close inspection before joining your station. Check leaf undersides, stem joints, and roots if present. The purpose is not to reject every shared plant, but to protect a space where young, close-set specimens can exchange pests easily through touching foliage.
Plan for maintenance when away from home
A propagation shelf with numerous tiny water containers and very shallow cells may need attention more often than an ordinary established houseplant collection. Before leaving for several days, reduce unnecessary containers, secure jars, and ask a capable person to check moisture as appropriate. Do not rely on sealed bags, permanent standing water, or electrical improvisations as last-minute travel fixes. Fewer well-established cuttings are easier to manage than many fragile ones started immediately before an absence.
Inspect your propagation shelf once a week
Start at the top: is the light mounted securely, with no overheating or bleaching where leaves are closest? Check that water cannot drip onto outlets, cords, or power strips. Any electrical equipment used near water should be suitable for the environment and installed according to its instructions.
Next, compare each cutting with its previous photograph. New roots, firm stems, and stable leaf condition are more informative than how many days the cutting has spent on the shelf. Unrooted cuttings generally do not need a strong fertilizer routine; prioritize suitable moisture, oxygen, and light. A humidity cover may help certain plants, but condensation, stagnant air, or fungal growth calls for more ventilation or a different setup.
Finally, label rooted and unrooted trays separately. A cutting ready for potting may need a gradual transition to normal room humidity. Remove failed material promptly rather than letting one deteriorating jar become a permanent fixture beside healthy cuttings.
Build for the work, not the photograph
An effective propagation shelf makes the process visible and manageable. Give cuttings suitable light, support roots appropriately, maintain hygiene, and keep water away from electrical hazards. Leave room for your hands and for growing leaves. If the station lets you notice and correct small problems without turning maintenance into a complicated project, it is doing its job.
References
Iowa State University Extension — How propagate houseplants stem tip cuttings
Iowa State University Extension — How clean and disinfect plant containers